
Blog

Our Blog

The first few months with a newborn are a magical time. As you cuddle and care for this tiny new person, an incredible bond begins to form. However, the realities of sleep deprivation, recovering from childbirth, and learning the ropes of parenting can make this period quite challenging too. The key is getting informed about proper newborn care and safety so you can enjoy your baby’s first days to the fullest.

In this guide, we’ll cover everything from feeding and sleeping tips to health and medical considerations. You’ll learn when to call the doctor versus when you can handle things at home. We’ll also discuss how to soothe fussy babies, establish schedules, and create safe sleep environments. With the right information, you can approach newborn care with confidence.

While each baby is unique, following the basics outlined here will set you up for success. Let’s dive in and prepare to ace newborn parenting in 2024!

Newborn Feeding

One of your most important jobs as a new parent is keeping your baby fed and nourished. Whether you choose to breastfeed or formula feed, following best practices will help your newborn thrive.

Breastfeeding vs. Bottle Feeding

Deciding between breastfeeding and bottle feeding is a personal choice. Here are some things to consider:

Benefits of breastfeeding: Breast milk provides ideal nutrition and contains antibodies that boost your baby’s immune system. Breastfeeding releases hormones that encourage bonding and has been shown to reduce a mother’s risk of certain cancers. It also costs nothing.

Tips for successful breastfeeding: Seek assistance from lactation consultants, use proper positioning and latch techniques, pump to increase milk supply if needed, and avoid bottles or pacifiers until breastfeeding is well-established. Stay hydrated and well-fed yourself.

When to use the formula: Formula is a healthy alternative when breastfeeding is challenging or not possible. Discuss supplements with your pediatrician.

Choosing bottles/nipples: Look for wide, slow-flow nipples that prevent overfeeding and accommodate a baby’s preference. Prioritize BPA-free materials.

Newborn Care

Feeding Schedules and Amounts

Learning when and how much to feed a newborn takes some trial and error. Follow these guidelines:

  • How often: Newborns need to eat every 2-3 hours, about 8-12 times per day. Watch for hunger cues.
  • Waking for feedings: Gently rouse sleeping newborns after 3-4 hours during the day to feed. Allow longer stretches at night.
  • Signs of enough milk: Expect 6-8 wet diapers and 3-4 dirty diapers daily. Weight gain and alertness after feedings also indicate adequate nutrition.
  • Burping/spitting up: Frequent burping during feedings reduces gas. Occasional spitting up is normal but may signal overfeeding if excessive.

Patience and paying attention to the baby’s cues are key to figuring out optimal feeding patterns. Your pediatrician can provide support if you’re concerned your baby isn’t eating enough.

Newborn Sleep Safety

Those sweet newborn cuddles will happen around the clock, as your baby’s sleep cycles consist of frequent but short periods of rest. Making your baby’s sleep environment as safe as possible is paramount.

Creating a Safe Sleep Space

The American Academy of Pediatrics makes these recommendations for safe newborn sleep:

  • Cribs should meet current safety standards with tight-fitting sheets. Keep cribs bare – no pillows, blankets, or crib bumpers.
  • Infants should sleep on their backs on a firm, flat surface. Do not use inclined sleepers.
  • Room sharing is recommended but keep baby’s sleep area free of hazards.
  • A bassinet or co-sleeper may be used for the first few months. Avoid bed-sharing.
  • Swaddling should be stopped once a baby can roll over. Use a wearable blanket instead.

Newborn Sleep Patterns and Solutions

While exhausting for parents, newborn sleep is by nature erratic. Understanding what’s normal helps you cope.

  • Newborns sleep 14-17 hours a day but only 1-3 hours at a time. Sleep cycles mature around 6 months old.
  • Frequent night wakings are developmentally normal. Attend to your baby’s needs gently and quickly.
  • Shift duties with a partner so each person gets a chance for uninterrupted sleep. Nap when the baby naps.
  • Try white noise, swinging, pacifiers, and swaddling to soothe babies back to sleep. Consult your pediatrician if challenges persist.
New born

Newborn Health and Medical Care

Well-baby checkups, vaccinations, and establishing a relationship with your pediatrician are key to ensuring your newborn stays happy and healthy.

Choosing a Pediatrician

  • Schedule your newborn’s first exam 3-5 days after hospital discharge. This critical check reviews weight, jaundice risk, etc.
  • Interview potential pediatricians in advance. Seek referrals from parents or hospital nurses.
  • Ask about office hours, insurance-accepted communication style, and visit protocols. Choose someone you feel comfortable with.
  • Pediatricians can diagnose illnesses, answer questions, explain behaviors, and ease concerns. Having one on call 24/7 provides peace of mind.

Well-Baby Visits and Vaccines

  • The CDC vaccination schedule protects against 14 diseases in the first year. Sticking to it is vital.
  • Well, visits happen at 1, 2, 4, 6, 9 and 12 months. Developmental milestones and growth are tracked.
  • Notify your pediatrician about fevers, persistent fussiness, breathing issues, major sleep or eating changes, and other red flags.
  • Learn infant CPR. Always have emergency numbers and basic medical supplies on hand. Stay alert to choking hazards.

FAQs about Newborn Care and Safety

How often should I feed my newborn?

A: Newborns need to eat every 2-3 hours, about 8-12 times per day. Watch for cues like rooting, sucking motions, and hands-to-mouth that signal hunger. Newborns should wake to feed after 3-4 hours during the day maximum.

What kind of diapers should I use?

A: Look for super soft, ultra-absorbent diapers with a cut that prevents leakage. Many parents prefer natural brands without dyes or fragrances. Stock up on newborn and size 1 diapers.

How can I get my newborn to sleep safely?

A: The American Academy of Pediatrics recommends room-sharing without bed-sharing. Place your newborn on their back on a firm, flat surface free of pillows and blankets. A crib, bassinet, or co-sleeper is best for safe sleep.

How do I know if my newborn is getting enough milk?

A: Expect 6-8 wet diapers and 3-4 dirty diapers daily. Newborns should have regular weight checks showing steady gains. Alertness during feedings and contentment afterward also indicate adequate nutrition.

When should I take my newborn to the doctor?

A: Schedule your newborn’s first pediatrician visit 3-5 days after hospital discharge. Then, well-baby checkups happen at 1, 2, 4, 6, 9 and 12 months. Call your pediatrician any time your baby has a fever, feeding issues, breathing problems, or other concerns.

Conclusion

While caring for a newborn can feel overwhelming, take comfort in knowing you’ve got this! Arm yourself with knowledge about feeding, sleeping, safety practices, and wellness care. Don’t hesitate to ask for help. With support and preparation, you and your baby will thrive.

The miracle of a new life is both a privilege and a responsibility. Use this guide as a reference as you navigate your way through the highs and lows of newborn care in 2024. Stay flexible, trust your instincts, and enjoy snuggling that sweet bundle of joy!

This page may contain affiliate links which contribute to a commission to us for purchase made through links. We only recommend products that we have personally used.

To learn more, visit the privacy policy page.

BABY PRODUCTS

DIAPERS & CHANGING

Pampers Swaddlers Newborn Diapers

Amazon.com: Pampers Swaddlers Newborn Diapers Size 1 140 Count : Baby

Pampers Pure Protection Diapers

Amazon.com: Pampers Pure Protection Diapers Size 0, 76 count – Disposable Diapers : Baby

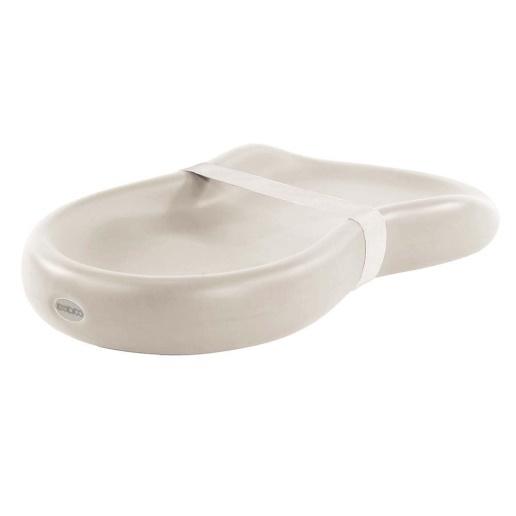
Keekaroo Peanut Changer Vanilla

https://amzn.to/3S7yDoU

https://m.media-amazon.com/images/I/41sqaus-hbL._SL1001_.jpg

Peekapoo – Disposable Changing Pad Liners

https://amzn.to/47tjwe6

https://m.media-amazon.com/images/I/71qLKmaLuLL._AC_SL1500_.jpg

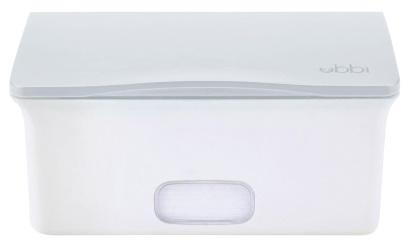
Ubbi Baby Wipes Dispenser

https://amzn.to/3He3Z6Y

https://m.media-amazon.com/images/I/51gv-snpFnS._SL1500_.jpg

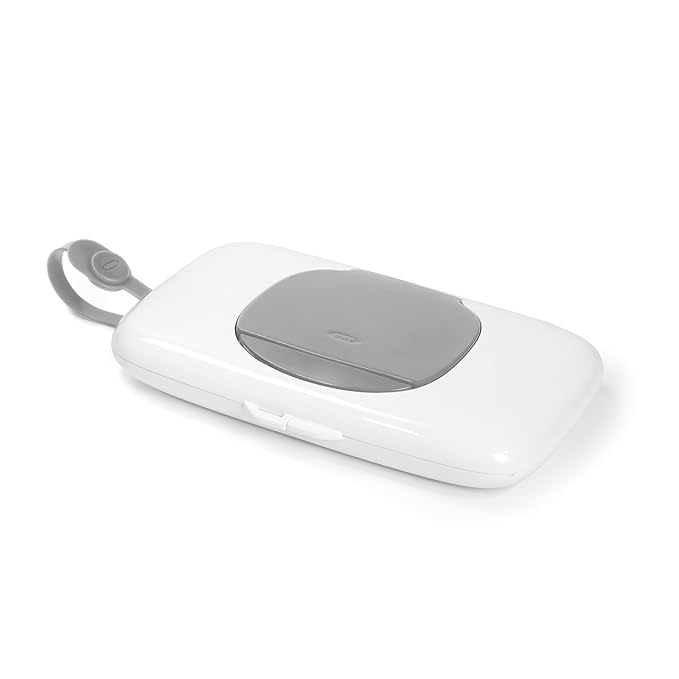
Wipe Despenser

https://amzn.to/4aPzUbO

Baby Portable Changing Pad Travel

https://amzn.to/3S5W56a

https://m.media-amazon.com/images/I/617RpUmhGIL._SL1500_.jpg

FEEDING

Holle Original Toddler Formula

https://amzn.to/48kFQrx

https://m.media-amazon.com/images/I/81BndKMrFqL._SL1500_.jpg

Baby’s Only Organic Whey & Dairy Protein Toddler Formula

https://amzn.to/41KRnOl

https://amzn.to/48GKos6

https://m.media-amazon.com/images/I/71ClWrCjUYL._AC_SL1325_.jpg

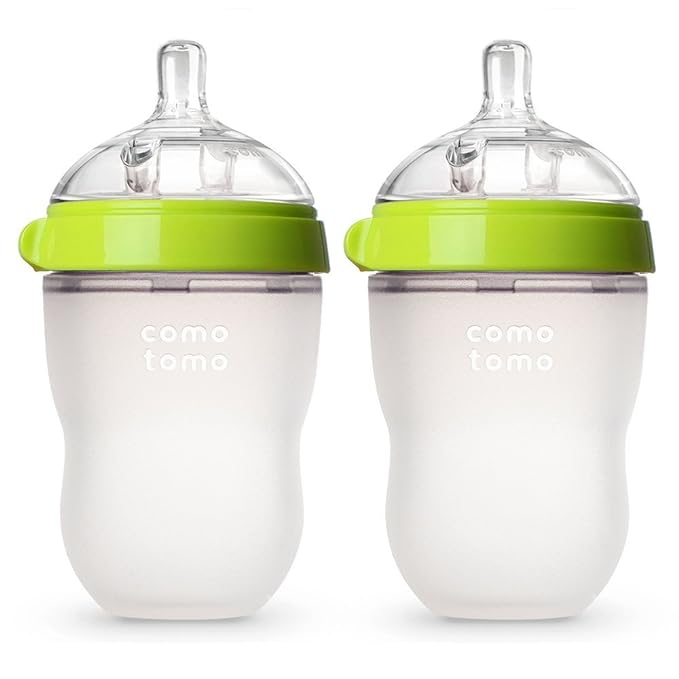
Comotomo Baby Bottle Bundle (Green)

https://amzn.to/48pSGVq

https://amzn.to/3tRQMOd

Comotomo Baby Bottle Bundle (Pink)

https://amzn.to/3TNZOX6

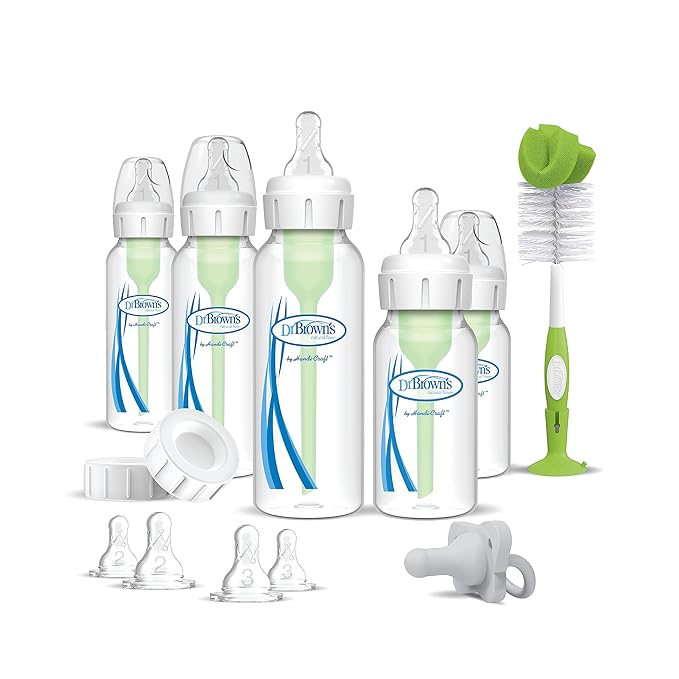
Dr Brown Feeding Bottle

https://amzn.to/3tK1wOF

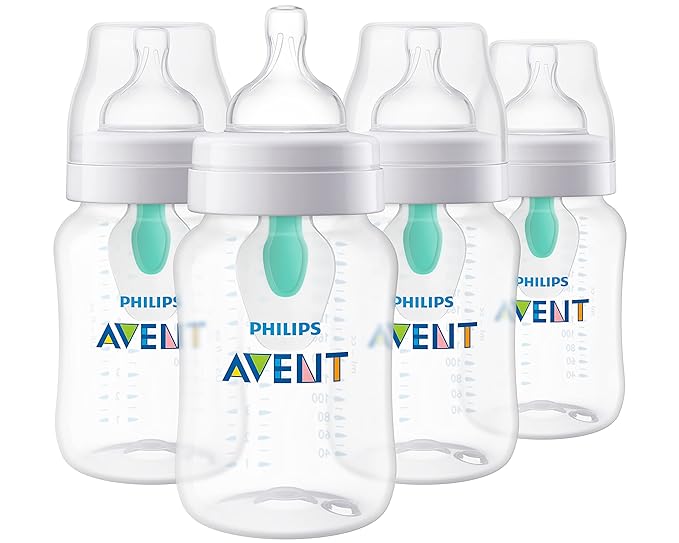
Phillips Avent Anti-Colic Bottle

https://amzn.to/3RIjd9a

Baby Brezza Baby Bottle Sterilizer and Dryer Machine

https://amzn.to/4aLRf55

https://amzn.to/48kc3z6

https://amzn.to/3S9cU07

https://amzn.to/3RR5tt2

https://amzn.to/3RM9SNF

https://amzn.to/4aHWZgh

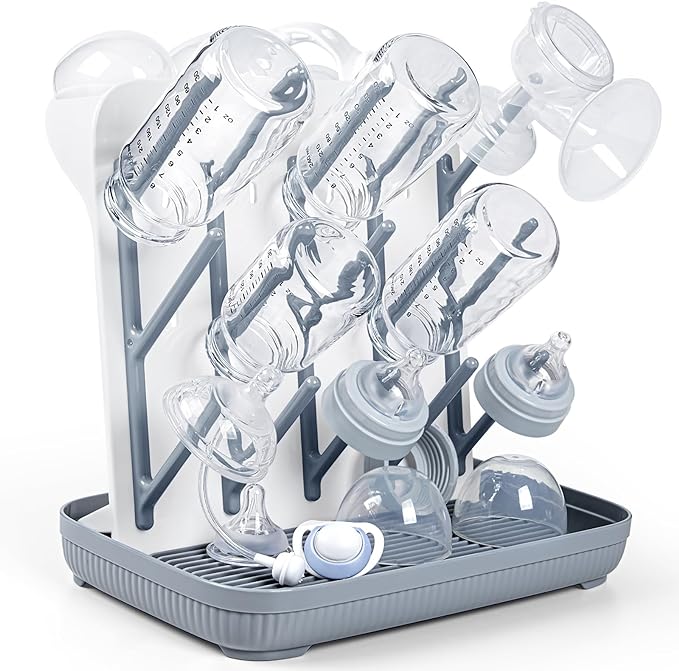
Drying Rack

https://amzn.to/48Kbsqb

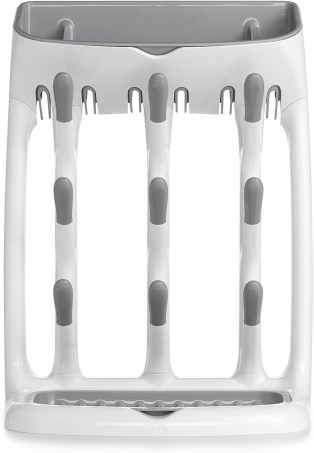
OXO Plastic Tot Drying Rack

https://amzn.to/3NS5rja

https://m.media-amazon.com/images/I/51vxj0hIDVL._AC_SL1500_.jpg

Dapple Baby, Bottle and Dish Soap

Dapple Baby, Bottle and Dish Soap Dish Liquid Plant Based Hypoallergenic 1 Pump Included, Packaging May Vary, Lavender, 16.9 Fl Oz (Pack of 3)

https://m.media-amazon.com/images/I/71DBKYj25QL._AC_SL1500_.jpg

YBM HOME 8-Inch Plastic Serve Mixing Bowl for Everyday Meals

YBM HOME 8-Inch Plastic Serve Mixing Bowl for Everyday Meals – Ideal for Cereal, Snacks, Popcorn, Salad, and Fruits, Microwave Safe, Blue

https://m.media-amazon.com/images/I/61HSoCFVLYL._AC_SL1500_.jpg

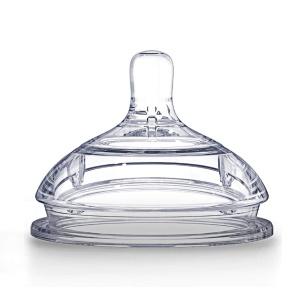
Comotomo Silicone Replacement Nipple

Amazon.com: Comotomo Silicone Replacement Nipple, Medium Flow, 3-6 Months, 2 Count

https://m.media-amazon.com/images/I/71p+vaLKz7L._SL1500_.jpg

Pure Life Distilled Water

Amazon.com: Pure Life Distilled Water, 1 Gallon, Plastic Bottled Water (6 Pack)

https://m.media-amazon.com/images/I/618UzcvFwOL._SL1500_.jpg

BIBS Pacifiers

Amazon.com: BIBS Chupetes – Color 4 unidades | Chupete redondo para bebé, pezón redondo | Chupete de látex de goma natural sin BPA | Hecho en Dinamarca | Tamaño 0 – 6 meses | Colores para niñas : Bebés

https://m.media-amazon.com/images/I/61aHWCqys9L._SL1500_.jpg

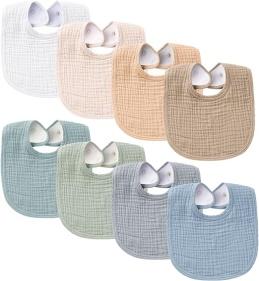
Konssy Muslin Baby Bibs

Konssy Muslin Baby Bibs 8 Pack Baby Bandana Drool Bibs Cotton for Unisex Boys Girls, 8 Solid Colors Set for Teething Drooling

https://m.media-amazon.com/images/I/71W4fmFukDL._AC_SX522_.jpg

PandaEar Set of 3 Cute Silicone Bibs

Amazon.com: PandaEar Set of 3 Cute Silicone Bibs for Babies & Toddlers (10-72 Months) Waterproof, Soft, Unisex, Non Messy (Brown/Blue/Green)

https://m.media-amazon.com/images/I/61Klj0p-U6L._AC_SX522_.jpg

Konssy Muslin Baby Bibs

Konssy Muslin Baby Bibs 10 Pack Baby Bandana Drool Bibs 100% Cotton for Unisex Boys Girls

Konssy Muslin Baby Bibs 10 Pack Baby Bandana Drool Bibs 100% Cotton for Unisex Boys Girls

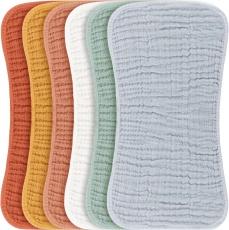
Konssy Muslin Baby Burp Cloths Sets

Konssy Muslin Baby Burp Cloths Sets for Unisex- 6 Pack Large 100% Cotton Burping Clothes for Newborn,Baby Girls and Boys

https://m.media-amazon.com/images/I/81r1w0GlWuL._AC_SL1500_.jpg

CLOTHING

Fruit of the Loom Baby 14-Pack Stretch Socks

Fruit of the Loom Baby 14-Pack Grow & Fit Flex Zones Cotton Stretch Socks – Unisex, Girls, Boys

Fruit of the Loom Baby 14-Pack Grow & Fit Flex Zones Cotton Stretch Socks - Unisex, Girls, Boys

BABYCIRCUS, Gender-Neutral Bodysuits/Onesies

BABYCIRCUS, Gender-Neutral, Baby Short-Sleeved Bodysuits/Onesies, 100% Cotton USA

BABYCIRCUS, Gender-Neutral, Baby Short-Sleeved Bodysuits/Onesies, 100% Cotton USA

Gerber unisex-baby Multi-pack Long-sleeve Onesies

Gerber unisex-baby Multi-pack Long-sleeve Onesies Bodysuit Mitten Cuff Sizes

Gerber unisex-baby Multi-pack Long-sleeve Onesies Bodysuit Mitten Cuff Sizes

Magnetic Me Footie Pajamas

Magnetic Me Footie Pajamas – 100% Organic Cotton Baby Pajamas – Quick Magnetic Fastener Sleeper for Baby Boy and Girl

Magnetic Me Footie Pajamas - 100% Organic Cotton Baby Pajamas - Quick Magnetic Fastener Sleeper for Baby Boy and Girl

BEDDING

TL Care Waterproof Quilted Sheet Saver

Amazon.com : TL Care Waterproof Quilted Sheet Saver Cover Made with Organic Cotton Top Layer, Natural Color, 2 Pack

HALO 100% Cotton Sleepsack Swaddle

HALO 100% Cotton Sleepsack Swaddle, 3-Way Adjustable Wearable Blanket, TOG 1.5, Heather Grey, Small, 3-6 Months

https://m.media-amazon.com/images/I/91L6KdQoM5L._SL1500_.jpg

Meracorallo Muslin Swaddle Blanket

Meracorallo Manta de muselina para envolver a bebé, suave y sedosa, manta neutra para bebés, niños y niñas, 47 x 47 pulgadas, juego de 4 colores sólidos

https://m.media-amazon.com/images/I/81A25dL9y3L._SL1500_.jpg

Lulu moon Muslin Swaddle Blanket Set

Amazon.com: Lulu moon Muslin Swaddle Blanket Baby Receiving Blankets Neutral, 2 Pack, Sage

https://m.media-amazon.com/images/I/81a8BECg1nL._AC_SL1500_.jpg

SwaddleMe by Ingenuity Original Swaddle

Amazon.com: SwaddleMe by Ingenuity Original Swaddle – Size Large, 3-6 Months, 3-Pack (Mountaineer)

https://m.media-amazon.com/images/I/917XHUCRHEL._SL1500_.jpg

Boppy Nursing Pillow

Boppy Nursing Pillow Original Support, Gray Taupe Leaves, Ergonomic Nursing Essentials for Bottle and Breastfeeding, Firm Fiber Fill, with Removable Nursing Pillow Cover, Machine Washable

https://amzn.to/48gypl7

https://amzn.to/3HaaGqN

https://m.media-amazon.com/images/I/719X1F5zPoL._SL1500_.jpg

BATHING & GROOMING

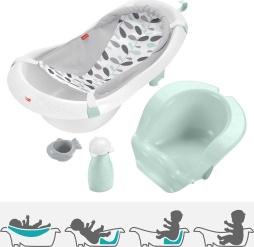
Fisher-Price Baby to Toddler Bath 4-in-1 Sling ‘n Seat Tub

Fisher-Price Baby to Toddler Bath 4-in-1 Sling ‘n Seat Tub with Removable Infant Support and 2 Toys, Climbing Leaves (Amazon Exclusive)

https://m.media-amazon.com/images/I/61McqxW9OzL._SL1500_.jpg

Babygoal Baby Nail Files 3 Pack

Babygoal Baby Nail Files 3 Pack,Newborn Nail Files with a Pouch,Genuine Czech Float Glass, Gift for Newborns,Toddlers,Infant, Babies &Young Children 3NF02

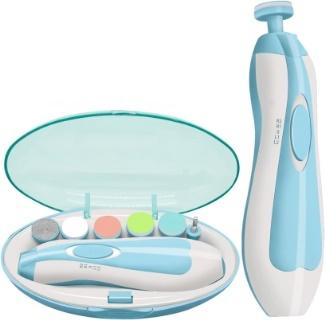
Baby Electric Nail Trimmer

Amazon.com: Baby Nail File Electric Nail Trimmer File Manicure Set, Toes Fingernails Care Trimmer with LED Light for Newborn, Kids and Adults

Babyganics 3X Baby Laundry Detergent

Babyganics 3X Baby Laundry Detergent, HE compatible, Stain-Fighting, Fragrance Free, 60 Fl Oz

Miss Mouth’s Messy Eater Stain Treater Spray

Amazon.com: Miss Mouth’s Messy Eater Stain Treater Spray – 4oz 3 Pack Stain Remover – Newborn & Baby Essentials – No Dry Cleaning Food, Grease, Coffee Off Laundry, Underwear, Fabric

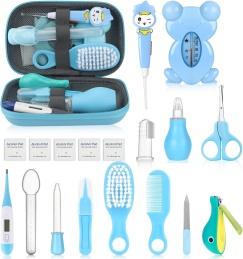
Baby Healthcare and Grooming Kit

Amazon.com: Baby Healthcare and Grooming Kit, Portable Baby Safety Care Set, Baby Essentials kit for Newborn (Blue 18 in 1)…

https://m.media-amazon.com/images/I/71GwEs6RupL._AC_SL1500_.jpg

Babyganics Baby Shampoo + Body Wash Pump Bottle

Babyganics Baby Shampoo + Body Wash Pump Bottle, Orange Blossom, Non-Allergenic and Tear-Free, 16 Fl Oz (Pack of 3), Packaging May Vary

https://m.media-amazon.com/images/I/61n+uQNUd7L._AC_SL1500_.jpg

Washcloth

https://amzn.to/3wffTvv

HIPHOP PANDA Hooded Towel

Amazon.com : HIPHOP PANDA Hooded Towel – Rayon Made from Bamboo, Soft Bath Towel with Bear Ears for Babie, Toddler, Infant – Ultra Absorbent, Baby Stuff Shower Gifts for Boy and Girl – (Bear, 30 x 30 Inch)

https://m.media-amazon.com/images/I/61ofzCFvsqL._SL1500_.jpg

Frida Baby The 3-Step Cradle Cap System

Amazon.com : Frida Baby The 3-Step Cradle Cap System, DermaFrida The FlakeFixer, Sponge, Brush, Comb and Storage Stand for Babies with Cradle Cap, White-Blue

https://m.media-amazon.com/images/I/71oo5V4lIdL._SL1500_.jpg

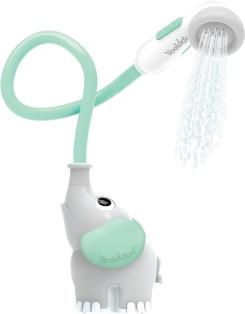
Yookidoo Baby Bath Shower Head

Amazon.com: Yookidoo Baby Bath Shower Head – Elephant Water Pump with Trunk Spout Rinser – Control Water Flow from 2 Elephant Trunk Knobs for Maximum Fun in Tub or Sink for Newborn Babies

https://m.media-amazon.com/images/I/61X0dmuJdxL._AC_SL1500_.jpg

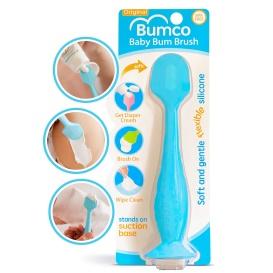
Bumco Baby Diaper Rash Cream Applicator

Amazon.com : Bumco Baby Diaper Rash Cream Applicator – Baby Bum Brush Diaper Cream Spatula for Butt Paste Diaper Cream – Newborn Baby Essentials, Perfect for Baby Registry, Baby Shower Gifts – Blue

https://m.media-amazon.com/images/I/71n3fxx48RL._SL1500_.jpg

Baby Hair Brush and Comb Set for Newborn

Amazon.com : Baby Hair Brush and Comb Set for Newborn – Wooden Baby Hair Brush Set with Soft Goat Bristle, Baby Brush Set for Newborns, Baby Brush and Comb Set Girl, Boy, Toddler Cradle Cap Brush (Oval, Walnut)

https://m.media-amazon.com/images/I/810fjaXou-L._SL1500_.jpg

Johnson & Johnson Safety Swabs

Amazon.com: Johnson & Johnson Safety Swabs 55 Ct(pack of 3)

https://m.media-amazon.com/images/I/416SfWdC9hL._AC_.jpg

HEALTHCARE

Boudreaux’s Butt Paste Diaper Rash Cream

Amazon.com: Boudreaux’s Butt Paste Maximum Strength Diaper Rash Cream, Ointment for Baby, 4 oz Tube

Little Remedies Saline Spray and Drops

Little Remedies Saline Spray and Drops, Safe for Newborns, 0.5 fl oz

https://m.media-amazon.com/images/I/71xY7Q+5G5L._AC_SL1500_.jpg

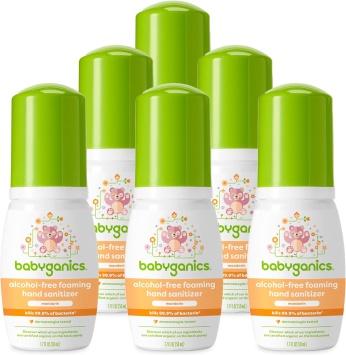
Babyganics Foaming Pump Hand Sanitizer

Amazon.com: Babyganics Foaming Pump Hand Sanitizer, Alcohol Free, Travel Size, Mandarin, Kills 99.9% of Common Bacteria, Moisturizing, 1.69 Fl Oz (Pack of 6)

https://m.media-amazon.com/images/I/81NRdQ-qzVL._AC_SL1500_.jpg

WaterWipes Plastic-Free

Amazon.com: WaterWipes Plastic-Free Original Baby Wipes, 99.9% Water Based Wipes, Unscented & Hypoallergenic for Sensitive Skin, 60 Count (Pack of 12), Packaging May Vary

Aquaphor Baby Healing Ointment

Amazon.com : Aquaphor Healing Ointment, Advanced Therapy Skin Protectant, Dry Skin Body Moisturizer, Multi-Purpose Healing Ointment, For Dry, Cracked Skin & Minor Cuts & Burns, 14 Oz Jar

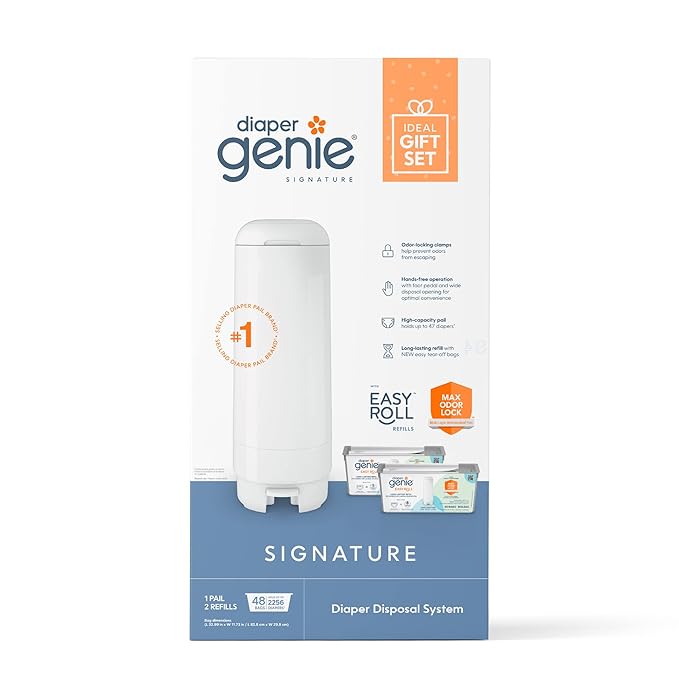
Diaper Genie

https://amzn.to/3RIiNzC

Lansinoh Lanolin Nipple Cream

Amazon.com: Lansinoh Lanolin Nipple Cream, Safe for Baby and Mom, Breastfeeding Essentials, 2.82 Ounces

https://m.media-amazon.com/images/I/810e8ZIf0JL._AC_SL1500_.jpg

Aquaphor Baby Healing Ointment

Amazon.com: Aquaphor Baby Healing Ointment To-Go Pack – Advanced Therapy for Chapped Cheeks and Diaper Rash – Two .35 oz. Tubes

https://m.media-amazon.com/images/I/71ZuxeGWJHL._AC_SL1500_.jpg

Mommy’s Bliss Original Gripe Water

Amazon.com: Mommy’s Bliss Original Gripe Water, Infant Gas and Colic Relief, Gentle & Safe, 2 Weeks+, 4 Fl Oz (Pack of 2)

https://m.media-amazon.com/images/I/91Mq4goTx1L._AC_SL1500_.jpg

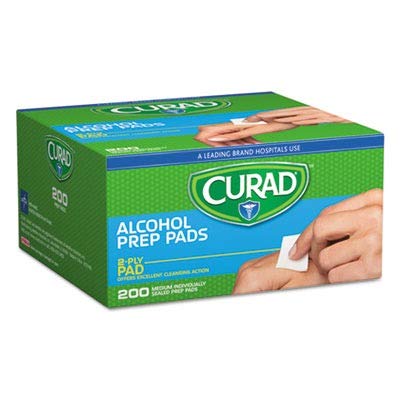
Dynarex Alcohol Prep Pad Sterile

Amazon.com: Dynarex 1113 Alcohol Prep Pad Sterile, Medium, Pack of 200

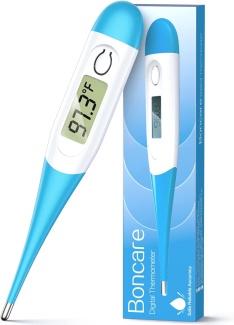
Thermometer for Adults

Thermometer for Adults, Digital Oral Thermometer for Fever with 10 Seconds Fast Reading (Light Blue)

https://m.media-amazon.com/images/I/610lBxabhTL._AC_SL1500_.jpg

Ddrops Organic Baby 400 IU 90 Drops

Amazon.com: Ddrops Organic Baby 400 IU 90 Drops – Daily Vitamin D Liquid for Infants. Supports Teeth & Bone Health. No Preservatives, No Sugar, Non-GMO, Allergy-Friendly

https://m.media-amazon.com/images/I/81eIG+fXanL._AC_SL1500_.jpg

Genexa Infants’ Pain and Fever Reducer

Genexa Infants’ Pain and Fever Reducer | Baby Acetaminophen, Dye Free, Liquid Oral Suspension Medicine for Infant | Delicious Organic Blueberry Flavor | 160 mg per 5mL | 2 Fluid Ounces

https://m.media-amazon.com/images/I/71usoIKEJRL._AC_SL1500_.jpg

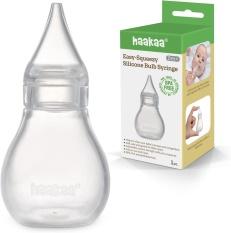
haakaa Silicone Baby Nasal Aspirator

Amazon.com: haakaa Silicone Baby Nasal Aspirator | Baby Nose Cleaner | Easy-Squeeze Nose Bulb Syringe, 0m+ Newborn- BPA Free Silicone

https://m.media-amazon.com/images/I/61rJVQUl8kL._AC_SL1500_.jpg

Ritual Postpartum Essentials Multivitamin

Amazon.com: Ritual Postpartum Essentials Multivitamin – Postnatal Vitamin with Omega-3 DHA & Choline for Lactation Support, Vitamin A, C, D3 & Zinc for Immune Function Support*, B12, Iodine, Biotin, Mint Essenced

https://m.media-amazon.com/images/I/81ciXTWiobL._AC_SL1500_.jpg

Dermoplast Pain, Burn & Itch Relief Spray

Amazon.com: Dermoplast Pain, Burn & Itch Relief Spray for Minor Cuts, Burns and Bug Bites, 2.75 Oz (Packaging May Vary)

T.N. Dickinson’s Witch Hazel Alcohol-Free Moisturizing Astringent

Amazon.com : T.N. Dickinson’s Witch Hazel Alcohol-Free Moisturizing Astringent, 100% Natural, 16 oz

https://m.media-amazon.com/images/I/71CAXXmjzeL._SL1500_.jpg

TUCKS Medicated Cooling Pads

Amazon.com: TUCKS Medicated Cooling Pads, 100 Count – Pads with Witch Hazel, Cleanses Sensitive Areas, Protects from Irritation, Hemorrhoid Treatment, Medicated Pads Used By Hospitals

Colace Clear Stool Softener Soft Gel Capsules

Amazon.com: Colace Clear Stool Softener Soft Gel Capsules Constipation Relief 50mg Docusate Sodium Doctor Recommended 28ct

https://m.media-amazon.com/images/I/818KfT6lE7L._AC_SL1500_.jpg

A+D Original Diaper Rash Ointment

Amazon.com: A+D Original Diaper Rash Ointment, Prevents & Protects Diaper Rash, Moisturizes & Heals Dry Skin With Vitamins A&D, 16oz Jar

https://m.media-amazon.com/images/I/61YgIzsWxaL._SL1500_.jpg

TOYS & PLAY MATS

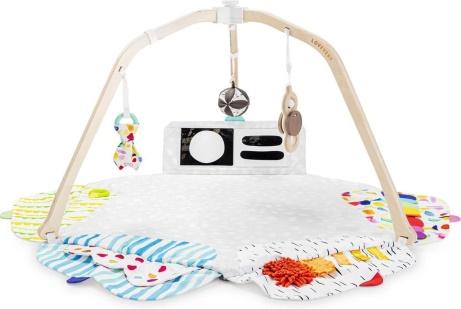
LOVEVERY Play Gym

Amazon.com: LOVEVERY | The Play Gym | Award Winning For Baby , Stage-Based Developmental Activity Gym & Play Mat for Baby to Toddler : Toys & Games

Baby Infant Rattle Socks Toys

Amazon.com: Baby Infant Rattle Socks Toys 3-6 to 12 Months Girl Boy Learning Toy

https://m.media-amazon.com/images/I/61Y2yTIr+CL._SL1000_.jpg

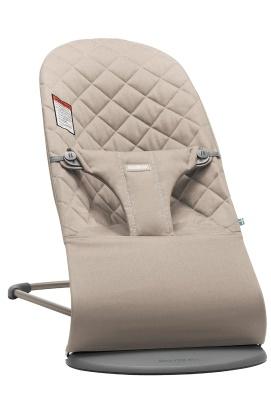
BabyBjörn Bouncer Bliss

Amazon.com : BabyBjörn Bouncer Bliss, Sand Gray, Cotton (006017US) : Baby

https://m.media-amazon.com/images/I/71Tz9xjjefL._SL1500_.jpg

SLEEPCARE

Baby Sound Machine

Amazon.com: Baby Sound Machine, Momcozy White Noise Machine for Baby Sleeping with Night Light, Toddler Sleep Trainer with 34 Soothing Sounds, Timer, App Remote Control, Personal Sleep Routine (Blue)

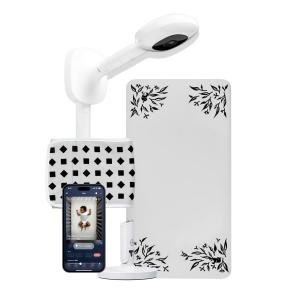
Nanit Pro Complete Monitoring System

Amazon.com: Nanit Pro Complete Monitoring System – Includes Wi-Fi HD Video Camera w/Nightlight and Night Vision, Multi-Stand, Smart Sheets & Breathing Wear Band – Tracks Infant Sleep, Breathing Motion, & Height

https://m.media-amazon.com/images/I/71XgKPaLB3L._SL1500_.jpg

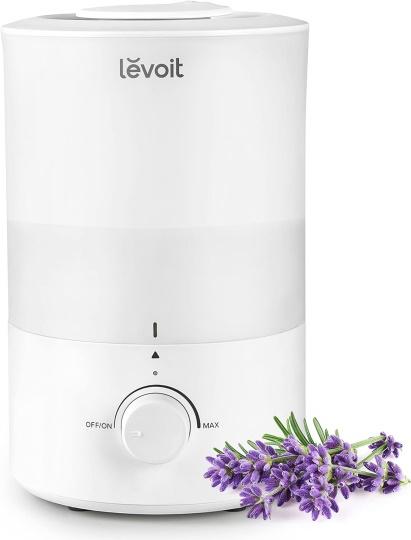
LEVOIT Humidifiers for Bedroom

Amazon.com: LEVOIT Humidifiers for Bedroom, Quiet (3L Water Tank) Cool Mist Top Fill Essential Oil Diffuser with 25Watt for Home Large Room, 360° Nozzle, Rapid Ultrasonic Humidification for Baby Nursery and Plant

https://m.media-amazon.com/images/I/7155j89DbTL._AC_SL1500_.jpg

NURSING & MATERNITY

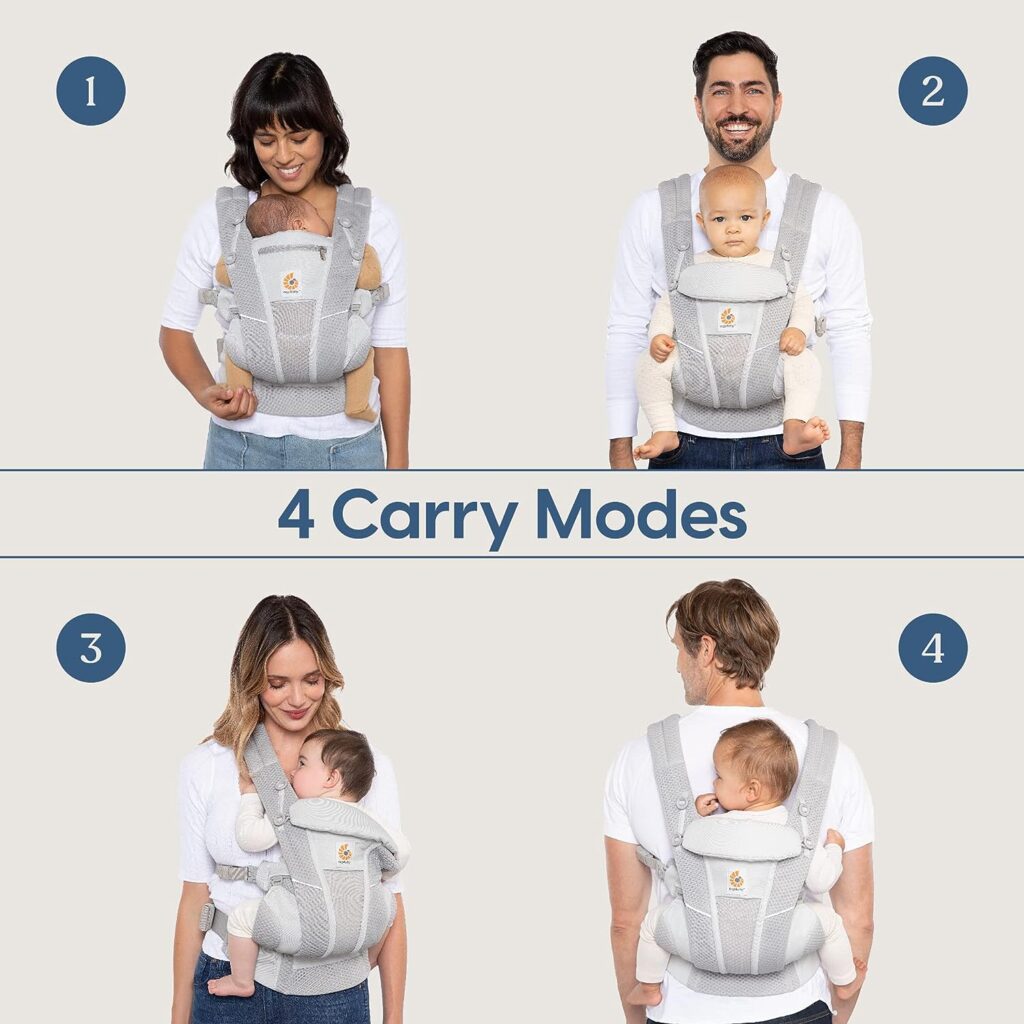
Erogbaby Carrier

https://amzn.to/3vAuQYn

Boba Baby Wrap Carrier

Amazon.com : Boba Wrap Baby Carrier – Original Stretchy Infant Sling, Perfect for Newborn Babies and Children up to 35 lbs (Gray)

https://m.media-amazon.com/images/I/51ZI1itBOVL._SL1000_.jpg

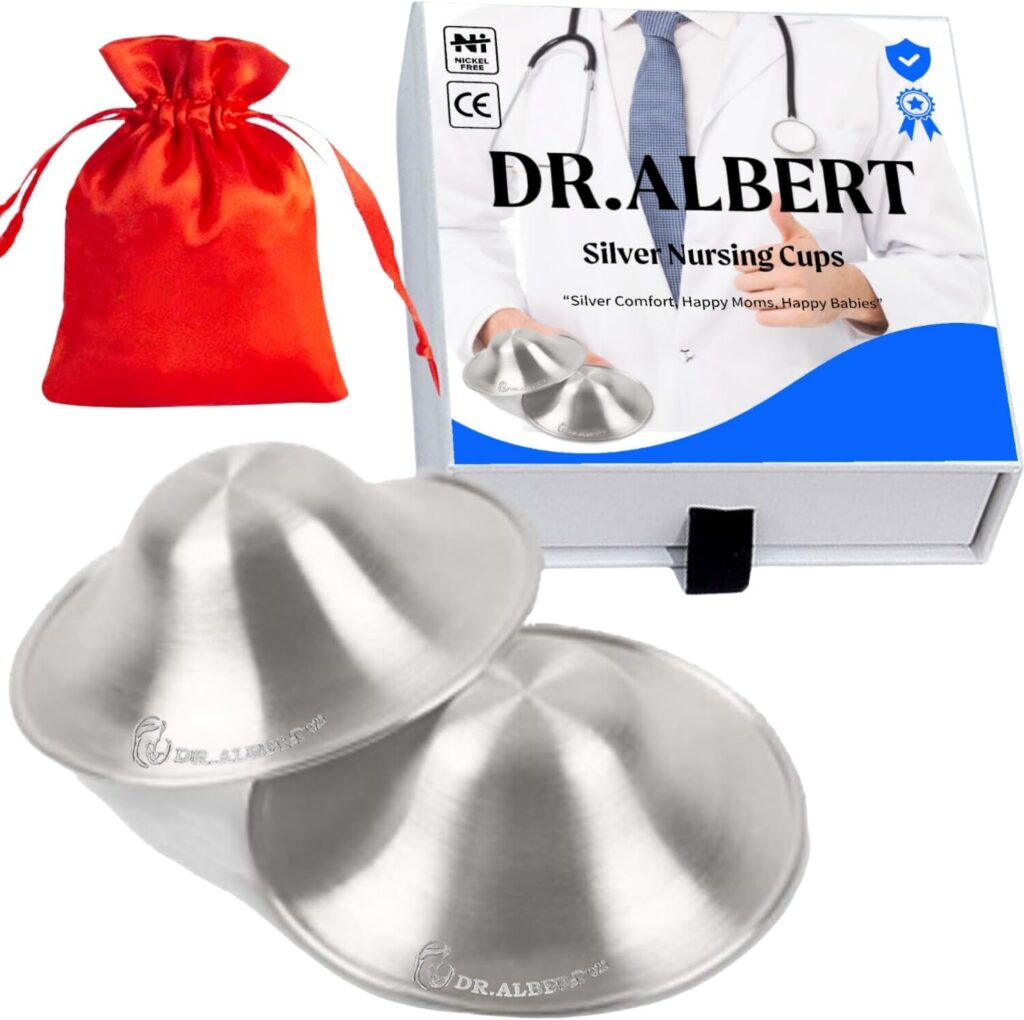
Nursing Cups

https://amzn.to/3H7FKYm

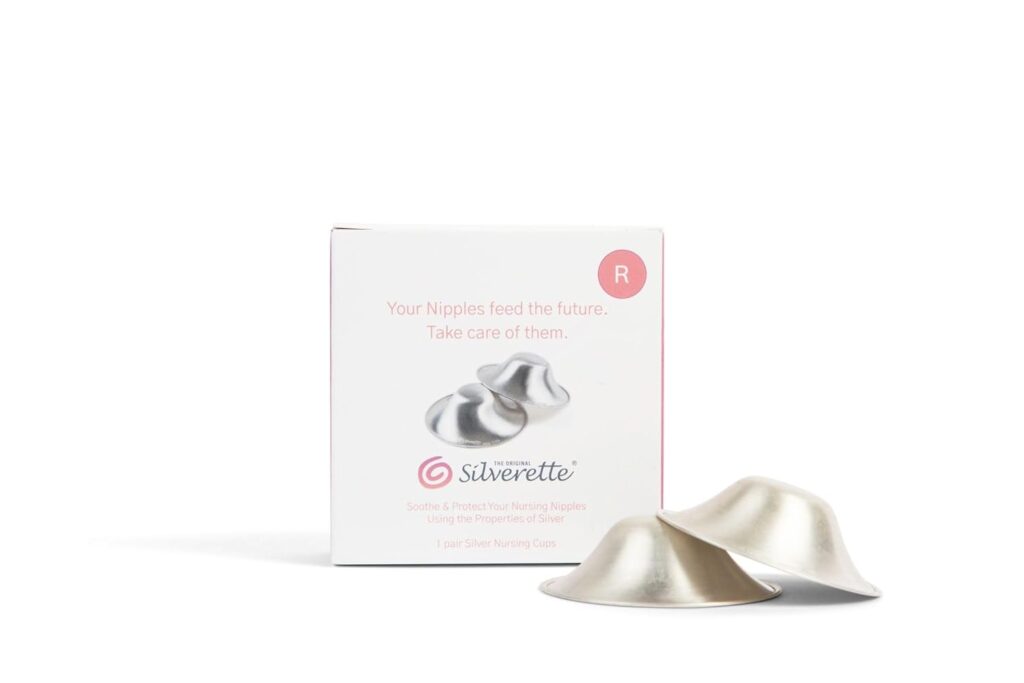
Nursing Cups

https://amzn.to/47r79z9

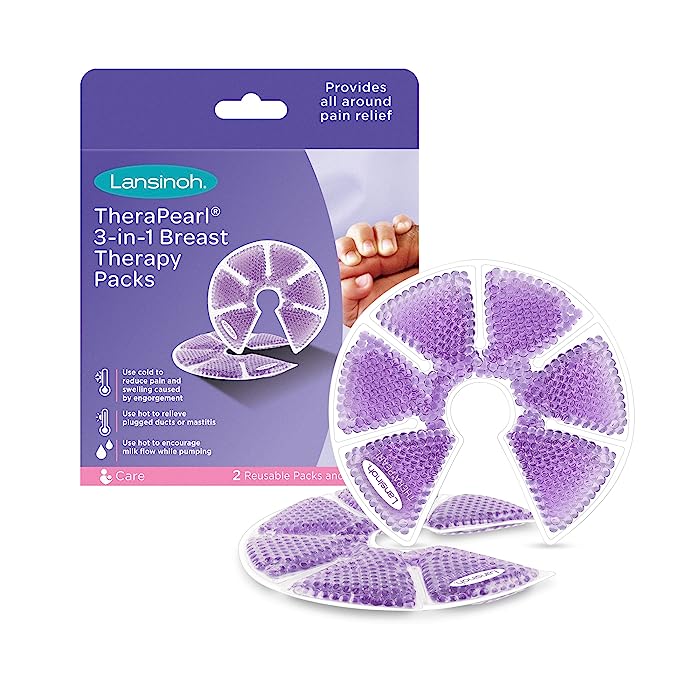
Breast Therapy Pack

https://amzn.to/48mZRh9

Nursing Breast Pad

https://amzn.to/47rPHKL

Frida Mom Cooling Hydrogel Nipple Pads

Amazon.com : Frida Mom Cooling Hydrogel Nipple Pads – Soothing Nursing Pads, Made for Sore Nipples, Breastfeeding Essentials for Mom, 8 Count

https://m.media-amazon.com/images/I/71hvrLVpG0L._SL1500_.jpg

Lansinoh Breastmilk Storage Bags

Lansinoh Breastmilk Storage Bags, 100 Count, 6 Ounce, Easy to Use Milk Storage Bags for Breastfeeding, Presterilized, Hygienically Doubled-Sealed, for Refrigeration and Freezing

Nipple Cream

https://amzn.to/4aLmYUe

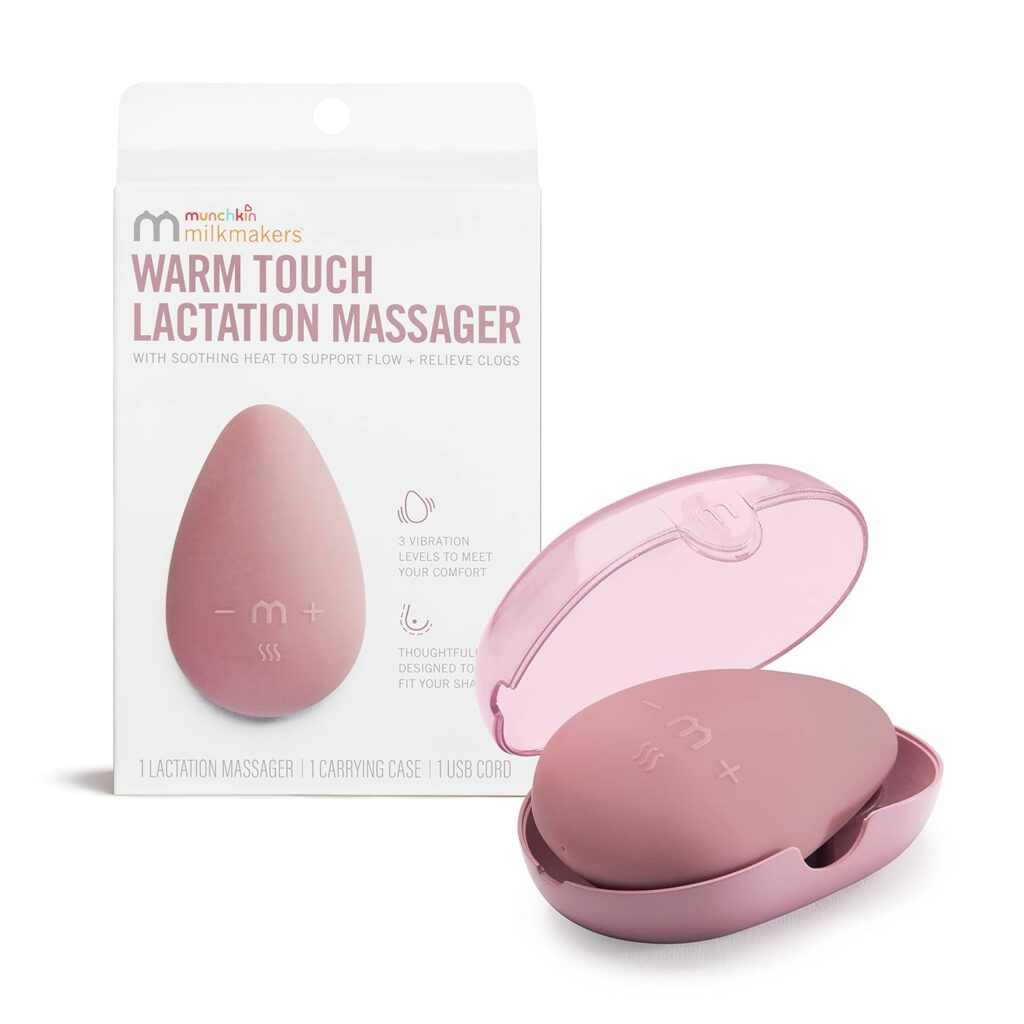
Breast Massager

https://amzn.to/3vsIPQa

https://m.media-amazon.com/images/I/7189fqYYnGL._AC_SL1500_.jpg

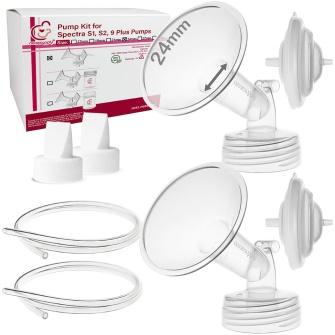
Nenesupply 24mm Flange Pump Parts

Amazon.com: Nenesupply 24mm Flange Pump Parts Compatible w Spectra S2 S1 Breast Pumps Replacement Kit for Spectra Pump Parts S2 Parts S2 Accessories Inc Flange Duckbill Valve Backflow Protector

https://m.media-amazon.com/images/I/61u8Vq4CbcL._SL1000_.jpg

Medela Contact Nipple Shield for Breastfeeding

Amazon.com : Medela Contact Nipple Shield for Breastfeeding, 24mm Medium Nippleshield, For Latch Difficulties or Flat or Inverted Nipples, 2 Count with Carrying Case, Made Without BPA

https://m.media-amazon.com/images/I/71hM5ZOy1HL._SL1500_.jpg

Portable Breast Pump

https://amzn.to/3tJ7IGM

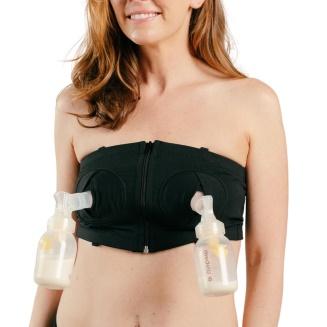
Simple Wishes Signature Hands Free Pumping Bra

Simple Wishes Signature Hands Free Pumping Bra, Patented, Black, Large/Plus

https://m.media-amazon.com/images/I/61PbsVFCWHL._SL1500_.jpg

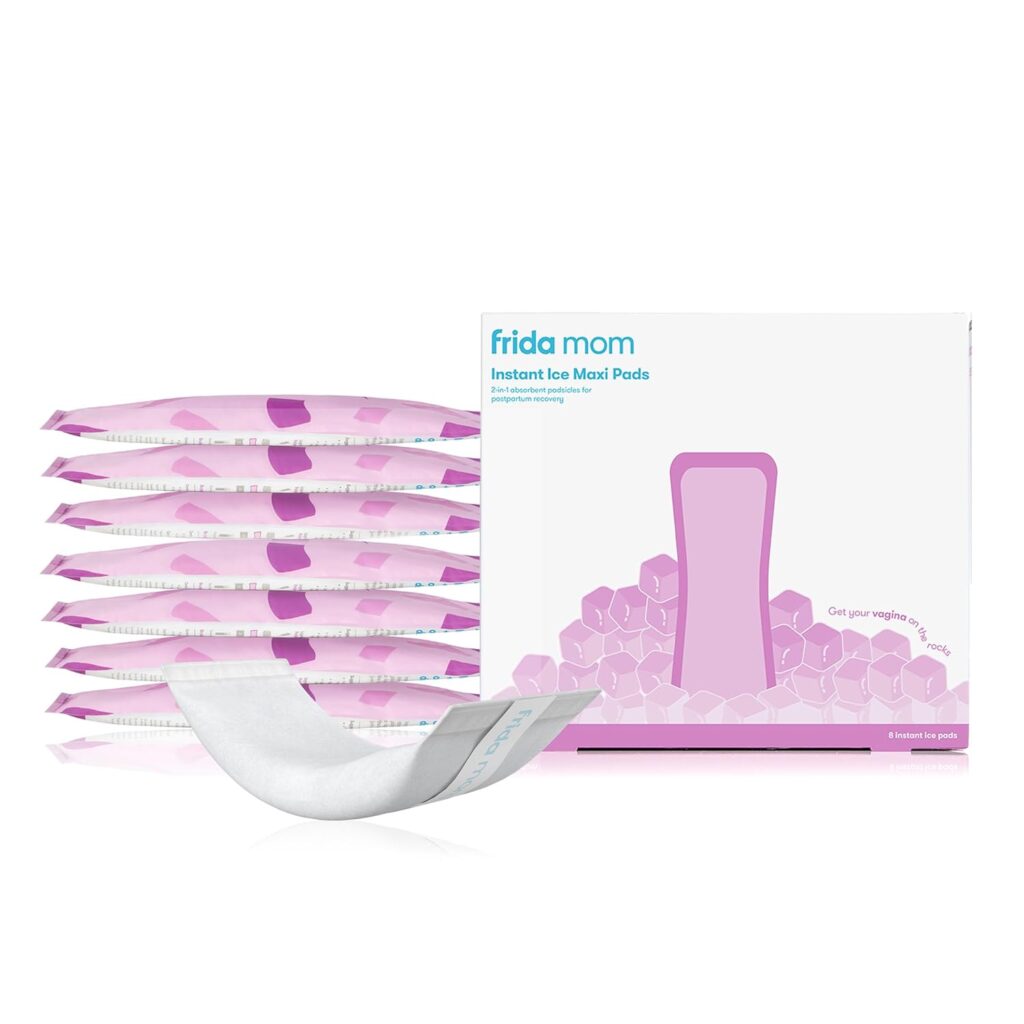
Frida Mom Ice Pads

https://amzn.to/3vtIEEh

Lansinoh Stay Dry Disposable Nursing Pads

Amazon.com : Lansinoh Stay Dry Disposable Nursing Pads, Soft and Super Absorbent Breast Pads, Breastfeeding Essentials for Moms, 200 Count

https://m.media-amazon.com/images/I/71e0wNZ3ZQL._SL1500_.jpg

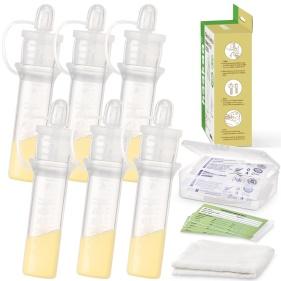
haakaa Colostrum Collector Kit Breast Milk Collector

Amazon.com : haakaa Colostrum Collector Kit Breast Milk Collector with Cotton Cloth Wipe and Storage Case, Ready-to-Use, Reusable, BPA Free, 4ml/6pcs

https://m.media-amazon.com/images/I/61GRsRlBnsL._SL1000_.jpg

haakaa Manual Breast Pump

haakaa Manual Breast Pump 4oz/100ml and Ladybug Milk Collector 2.5 oz/75ml Combo for Breastfeeding, Made of Food Grade Silicone

https://m.media-amazon.com/images/I/71zH3RyReVL._AC_SL1500_.jpg

Breast Pump

https://amzn.to/3HWnfX1

Portable Breast Pump

https://amzn.to/3HXUPfm

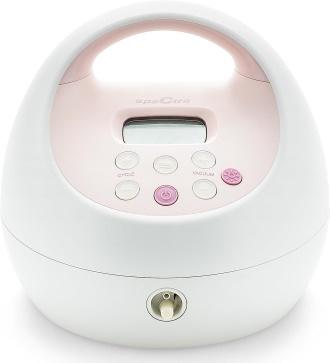
Spectra – S2 Plus Electric Breast Milk Pump

Amazon.com : Spectra – S2 Plus Electric Breast Milk Pump for Baby Feeding – Convenient Breast Feeding Support

https://m.media-amazon.com/images/I/61ZQxjbBKLL._SL1500_.jpg

Postpartum Therapy Pack

https://amzn.to/3San54m

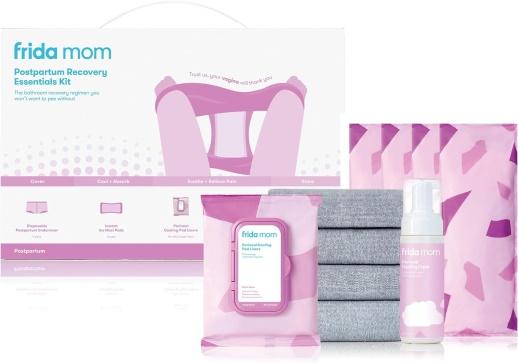
Frida Mom Postpartum Recovery Essentials Kit

Amazon.com: Frida Mom Postpartum Recovery Essentials Kit | Disposable Underwear, Ice Maxi Absorbency Pads, Cooling Witch Hazel Medicated Pad Liners, Perineal Medicated Healing Foam (11 PIECE SET) : Health & Household

https://m.media-amazon.com/images/I/71t+9zqSOvL._AC_SL1500_.jpg

Sitz Bath Salt – Postpartum Care and Hemorrhoid Treatment

Sitz Bath Salt – Postpartum Care and Hemorrhoid Treatment – Natural Soak for Self Care and Hemmoroid Treatment – Post Partum Essentials, 10 Oz, by Pure Body Naturals

https://m.media-amazon.com/images/I/71k-tGU-mNL._AC_SL1500_.jpg

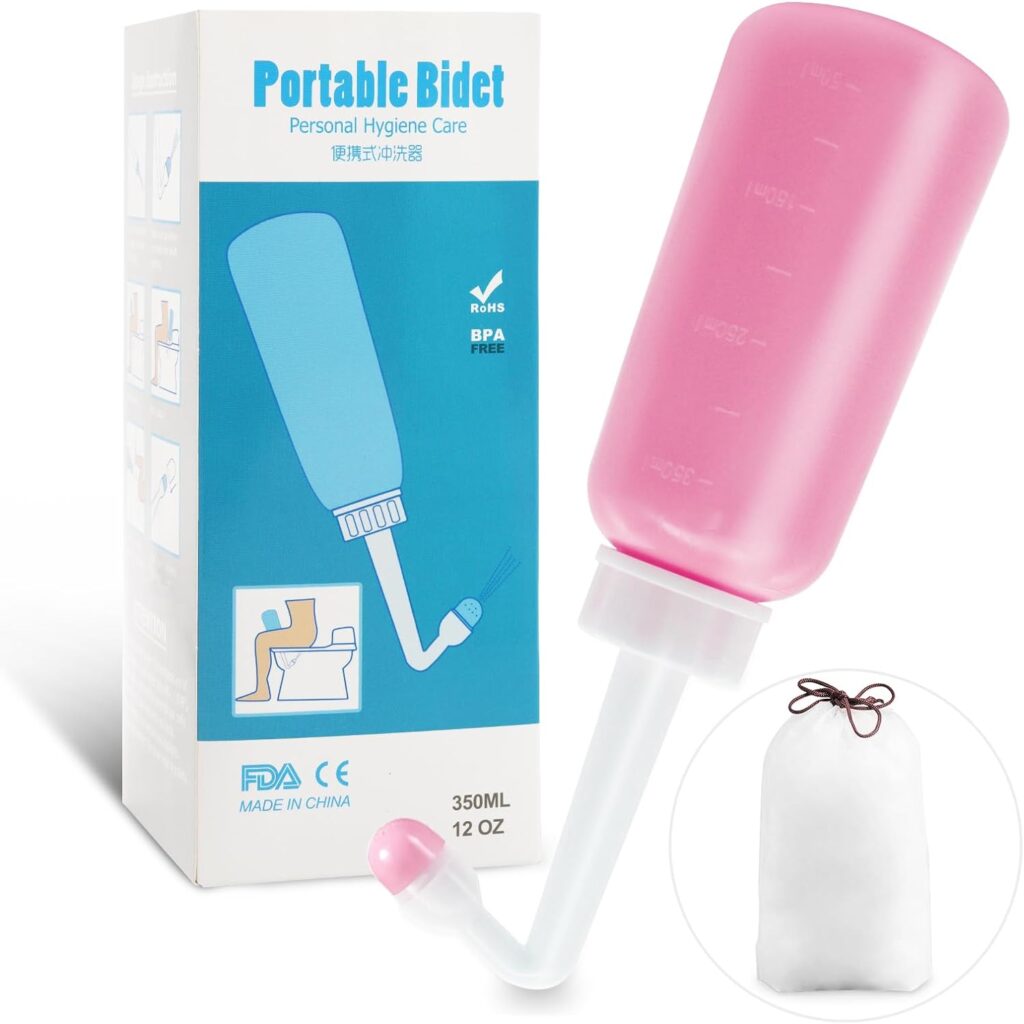
Peri Bottle

https://amzn.to/3NWw5aS

Nursing Bra

https://amzn.to/3tGTWV9

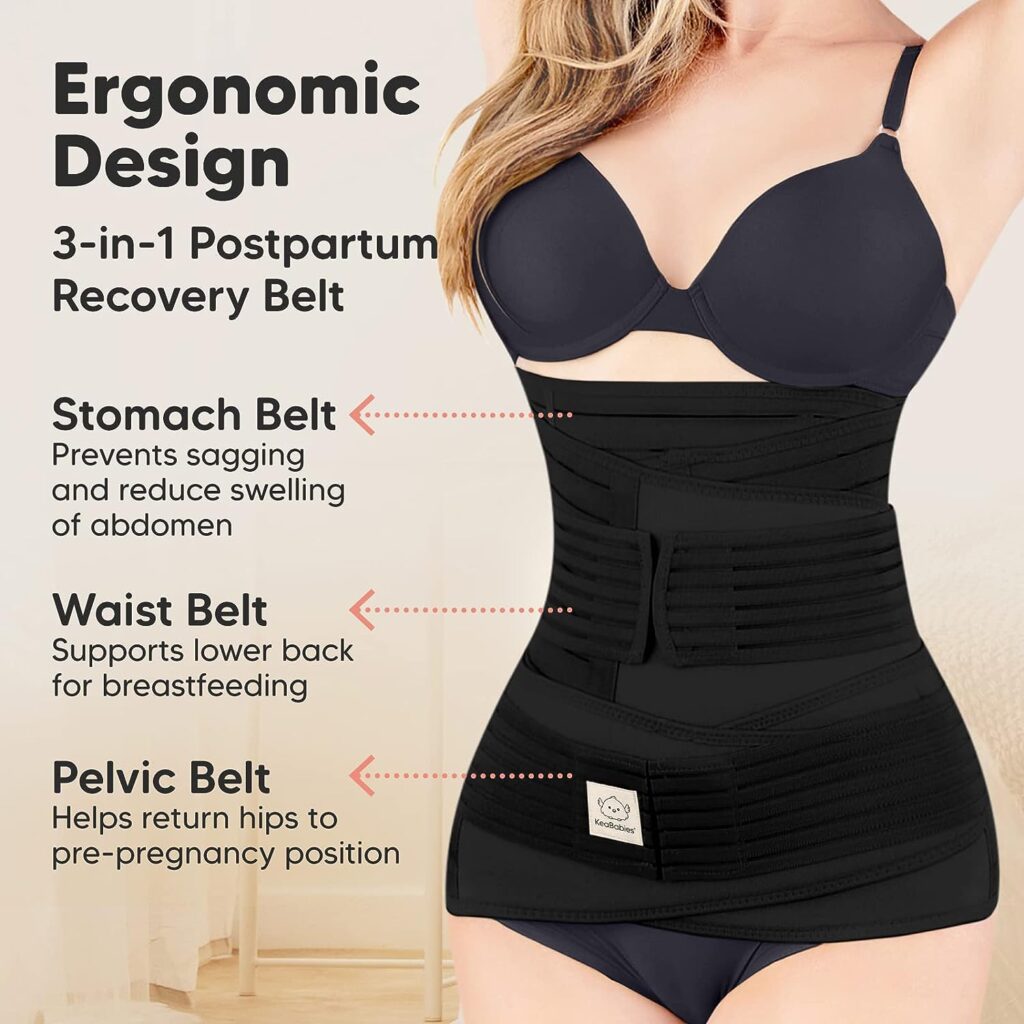
Postpartum Belly Band

https://amzn.to/3NTJK2i

AZMED Maternity Belly Band for Pregnant Women

Amazon.com: AZMED Maternity Belly Band for Pregnant Women – Pregnancy Must Haves Belly Support Band for Abdomen, Pelvic, Waist, Back

https://m.media-amazon.com/images/I/81OJ5p7SOuL._SL1500_.jpg

Wirarpa Women’s Cotton Underwear

wirarpa Women’s Cotton Underwear High Waisted Ladies Panties Full Coverage Briefs 4 Pack (Regular & Plus Size)

wirarpa Women's Cotton Underwear High Waisted Ladies Panties Full Coverage Briefs 4 Pack (Regular & Plus Size)

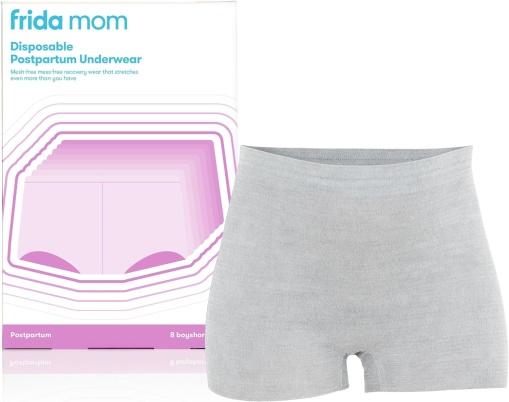
Frida Mom Disposable Boyshort Cut Postpartum Underwear

Frida Mom Disposable Boyshort Cut Postpartum Underwear by Frida Mom |Super Soft, Stretchy, Breathable, Wicking, Latex-Free – Size – Petite, 8 Count

https://m.media-amazon.com/images/I/81oifXMtceL._AC_SL1500_.jpg

Maternity Nursing Pajama

https://amzn.to/48Nn1wL

Nursing Nightgown

https://amzn.to/3NPSBSv

Maternity Pajama Set

https://amzn.to/426j1FT

Ekouaer Maternity Pajama Set

Ekouaer Maternity Pajama Set Button Down Nursing Sleepwear Long Sleeve Breastfeeding Loungewear with Adjustable Pants

Ekouaer Maternity Pajama Set Button Down Nursing Sleepwear Long Sleeve Breastfeeding Loungewear with Adjustable Pants

Becoming a new parent is one of life’s most precious and rewarding experiences. At the same time, it can feel overwhelming caring for a tiny, helpless human who depends on you for everything. Proper newborn care during the first weeks and months lays the foundation for your baby’s health, growth, and development.

This comprehensive guide provides essential newborn care tips for feeding, sleeping, diapering, bathing, health, and safety to help you confidently care for your little one.

Essential Newborn Care Tips

These essential newborn care basics will help new parents provide for their baby’s needs in the early months.

Feeding

One of the most important newborn care tasks is proper feeding. This ensures your baby receives adequate nutrition to fuel growth and development.

Breastfeeding vs. formula feeding: Both breastmilk and formula can provide complete nutrition. Breastmilk offers immune system benefits and convenience without preparation. The formula may be necessary or preferred for various reasons. Discuss options with your doctor.

Bottle feeding tips: If bottle feeding, always hold the baby upright. Tilt the bottle so milk fills the nipple and air doesn’t get in. Pace feedings so the baby doesn’t ingest too much air. Never prop bottles.

Feeding schedules: At first, nurse or feed baby 8-12 times per day on demand. Watch for hunger cues like rooting, sucking, or putting hands to mouth. As baby grows, they will develop more predictable feeding patterns.

Spit up and reflux: It’s normal for newborns to spit up small amounts after eating. Frequent large spit-ups or full-body arching may signal reflux requiring medical attention. Try smaller, more frequent feeds or hold the baby upright 20 minutes after eating.

Sleeping

Newborn sleep patterns are completely different than adult sleep. Learning the baby’s sleep cues and establishing safe sleep practices will help everyone rest better.

Newborn sleep patterns: Newborns sleep 14-17 hours per day but only 1-3 hours at a time. They cycle quickly between sleep stages with brief periods of deep sleep. By 6 months, longer stretches at night develop.

Safe sleep environment: Place baby alone on their back on a firm, flat mattress with a tight-fitting sheet. Keep the sleep surface free of toys, pillows, and loose bedding. Room sharing is recommended.

Soothe a crying baby: Crying peaks around 2 months. Try calming techniques like swaddling, shushing, swinging, sucking, or baby-wearing. Develop a bedtime routine like feeding, bathing, and rocking to signal sleep.

Sleep training: Gradually establish more consistent nap and bedtimes. Use the same soothing strategies at bedtime to help the baby learn to self-soothe to sleep.

Newborn Sleep

Diapering

Frequent diaper changes are essential for newborn health and to prevent painful diaper rash. Stock up on supplies and establish a diaper-changing routine.

Diaper frequency: Newborns need 10-12 diaper changes per day. Change immediately after waking up, after feeding, and whenever soiled. Urine and stool frequency change with nutrition and age.

Preventing diaper rash: Change wet and soiled diapers promptly. Clean and fully dry the baby’s skin with each change. Apply diaper cream or petroleum jelly at early signs of redness. Let the baby go diaper-free for brief intervals.

Diapering procedure: Get organized with supplies like fresh diapers, wipes, and cream before placing the baby on the changing pad. Always keep one hand on the baby. Clean skin gently but thoroughly. Dispose of diapers properly. Wash hands after.

Bathing & Grooming

While not necessary every day, regular newborn bathing helps keep babies fresh, calm, and healthy. Learn baby bathing basics plus tips for trimming nails and caring for hair and skin.

Newborn bath basics: Sponge bathes newborns until the umbilical cord stump falls off and any circumcision heals. Use lukewarm water and mild soap. Support neck and head while quickly washing baby and rinsing well. Keep ear canals dry.

Safety tips: Never leave the baby alone during bathing. Have supplies ready beforehand. Monitor bath water temperature carefully. Lay baby on a towel and dry thoroughly, patting skin gently.

Trimming nails: Use baby nail clippers or scissors with rounded tips. Trim just the very ends after a bath while the nails are soft. Cut nails straight across to avoid ingrown nails.

Skin and hair care: Apply gentle moisturizing lotion after baths. Comb newborn hair gently with a soft brush and use mild baby shampoo if needed. Baby acne and other rashes are common newborn skin issues.

Health & Hygiene

While most newborns are healthy, it’s essential to recognize signs of illness and establish safe health and hygiene routines right away.

Newborn appearance: Many newborns have a thin coating of vernix at birth. Baby acne, rashes, flaky skin, and yellowish skin are common and usually resolve. Call your doctor with any unusual redness or swelling.

Identifying illness: Contact your pediatrician if the baby has a rectal temperature over 100.4°F, difficulty breathing, blue-tinted skin, excessive crying, or a significant decrease in appetite or activity.

Newborn CPR: Take an infant CPR class to be prepared in an emergency. Always support the head and neck if the baby is struggling to breathe. Gently wipe nose and mouth with bulb syringe if unable to clear secretions.

Hygiene basics: Wash hands before touching the baby and after every diaper change. Disinfect the changing area after each use. Use hospital-grade disinfectant on pacifiers and bottle parts. Avoid contact with sick children or adults.

Newborn Care Tip

Additional Newborn Care Tips

These extra newborn care tips will prepare parents to meet the baby’s needs for soothing, bonding, and adjusting to their new normal.

Soothing a Fussy Baby

Excessive crying can be frustrating and concerning for new parents. Try these soothing techniques:

  • Swaddling snugly in a blanket provides comforting confinement.
  • White noise from shushing, humming, fans, or sound machines mimics the womb.
  • Gentle bouncing, rocking, or swinging may calm the baby.
  • Offer a pacifier for sucking and self-soothing.
  • Baby-wearing in a sling or carrier provides closeness.

If crying becomes unmanageable, check for hunger, diaper rash, illness, or other needs. Never shake or harm the baby. Set baby somewhere safe like the crib and take a breather if needed.

Bonding and Connecting With Your Newborn

Building a strong bond from the start has lifelong benefits. Try:

  • Skin-to-skin contact by holding baby bare-chested.
  • Reading, singing, and playing facial games help the baby engage.
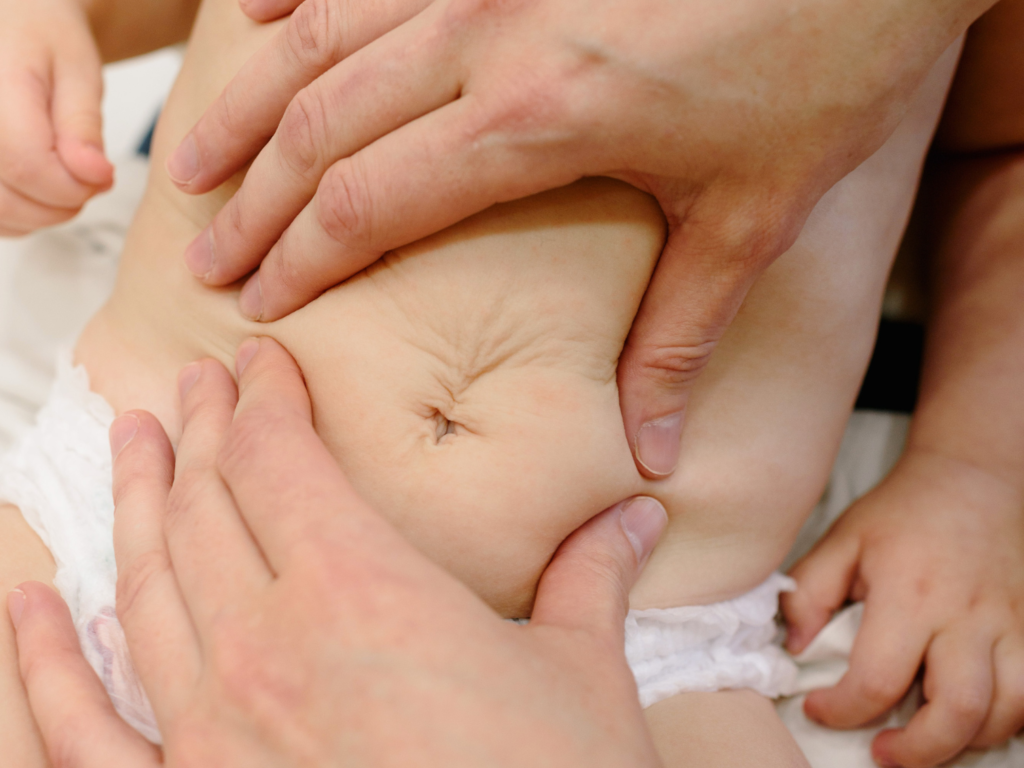
  • Infant massage with gentle strokes promotes touch.
  • Go for walks together to introduce new sights and sounds.
  • Maintain eye contact while feeding and talking with the baby. Match baby’s noises sometimes.

Caring For Yourself Postpartum

Postpartum self-care is vital but often overlooked. Be sure to:

  • See your doctor for normal postpartum appointments and check-ups.
  • Gradually resume pelvic floor exercises to promote healing.
  • Reach out for help with postpartum depression symptoms like excessive crying, anxiety, or lack of bonding with your baby. You don’t have to tough it out alone.
  • Rest when the baby sleeps. Let others cook, clean, and hold the baby sometimes. Lower standards temporarily.

Preparing Your Home & Lifestyle

Major adjustments are in order when bringing home a newborn:

  • Remove choking hazards and anchor heavy furniture to the walls. Install cabinet locks and cover outlets.
  • Discuss parenting responsibilities with your partner upfront. Communicate needs clearly.
  • If you have other children, schedule one-on-one time with them for reassurance. Involve them appropriately with newborn care.
  • Freeze casseroles and meals to have on hand for quick dinners. Stock up on easy snacks and household paper products.
  • Ask for and accept help from family and friends. Most want to assist and will be happy to hold your baby while you shower.

FAQs

What are some newborn sleep tips?

  • Allow days and nights to mingle at first. Then gradually differentiate them.
  • Establish calming bedtime routines like swaddling, dimming lights, reading, or singing.
  • Put baby to sleep drowsy but awake so they learn to self-soothe.
  • Wait 15-20 minutes before responding to fussing to allow the baby to resettle.
  • Avoid stimulating the baby too much in the evenings by keeping feedings calm with minimal play.

How do I know if my newborn is getting enough milk?

  • Monitor wet and dirty diapers which signal adequate intake.
  • Watch for proper weight gain at pediatrician visits.
  • Notice swallowing and contentment during feeding.
  • Ensure baby wakes to feed 8-12 times daily, especially in the first few weeks.

When should I take my newborn to the doctor?

Take baby to the pediatrician for well-child checkups at:

  • 3-5 days old.
  • 1 month old.
  • 2 months old.
  • 4 months old.
  • 6 months old.

Also see the doctor right away with any fever over 100.4°F, difficulty breathing, a significant decrease in appetite or activity, or other concerning symptoms.

What supplies do I need for a newborn?

Stock up on burp cloths, pacifiers, baby lotion/shampoo, diapers in various sizes, sensitive baby wipes, cotton swabs, nasal aspirators, digital thermometers, nail clippers, baby washcloths, baby blankets, baby towels, crib sheets, sleep sacks, changing pad, and infant car seat.

How can I soothe a crying newborn?

  • Check diaper, hunger, temperature, clothing comfort, and other physical needs first.
  • Try calming techniques like swaddling, baby-wearing, white noise, and gentle motion.
  • Give a pacifier for sucking.
  • Keep lights low and voices soft.
  • Hold baby skin-to-skin.
  • Take baby for walk outside.
  • Draw a warm bath to relax baby.

Conclusion

The infant days go by in a blur of feedings, diaper changes, and cat naps. While tiring for new parents, this precious time also passes quickly. By providing attentive newborn care in the early months, parents can help their babies thrive while building a strong foundation for their lifelong health and well-being. Follow these essential newborn care tips and enjoy every moment with your little bundle of joy.

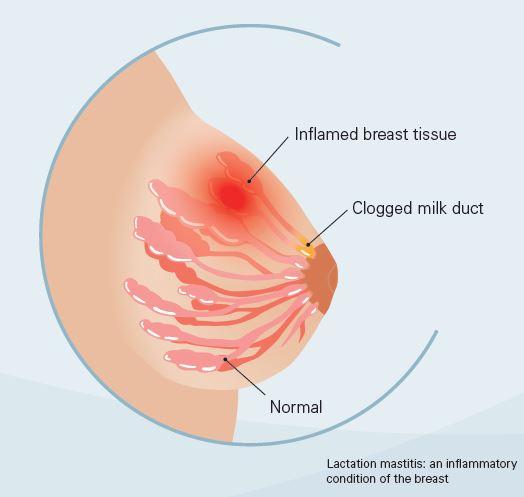
Giving birth is an overwhelming and wholesome experience. Your body experiences various changes to adapt to this new phase of life. A prominent change occurs in your breasts due to hormonal changes during pregnancy or breastfeeding. However, sometimes, there are complications that can occur during birth or in the case of breastfeeding. One such complication is Mastitis.

Mastitis is a common inflammation of your breast tissue. It is a painful condition which can often lead to bacterial infections.

Mastitis is common in pregnant women or mothers who are breastfeeding. It can also occur in men or women who are not best-feeding, but it is a rare occurrence.

Mastitis in Breastfeeding Women

Mastitis is most commonly associated with breastfeeding women. If you have cracked nipples, milk stasis, or bacteria, this creates a breeding environment for infection. According to research over the years, around 10% of breastfeeding women are estimated to experience Mastitis at some point.

Breastfeeding mothers should be vigilant about their breast health and watch out for any signs of Mastitis. Early recognition and prompt treatment can prevent complications and allow for a quick recovery.

Cause of Mastitis

Mastitis occurs when the milk produced cannot effectively flow in the breast. It can be due to two reasons:

  • Hyperlactation/Overproduction of Milk

It is the most common cause of Mastitis. When the milk is over-produced, it increases the pressure around the breast tissues, ultimately putting pressure on the milk ducts, causing them to narrow down. This results in swollen breasts, which can also lead to bacterial Mastitis.

  • Back of Milk

Mastitis can also occur when your baby does not suck the milk from your breasts properly. It is most common in the first trimester of lactation. In this case, the milk is not drained correctly from the breast, which causes blocked and swollen milk ducts. 

  • Bacteria in the Breast

One cause of Mastitis is when bacteria from your skin’s surface or even your baby’s mouth enter the breast. It enters via the crack in your nipple’s skin to your milk ducts, causing extremely painful swelling and red appearance of your breast. 

Bacterial Mastitis may also lead to abscess formation, discharged from the nipple like pus.

Symptoms of Mastitis

Mastitis presents various symptoms that can vary depending on the severity of the condition. These symptoms include:

  • Breast pain and tenderness
  • Swelling and discomfort
  • The sensation of a hard lump in the breast
  • Redness and warmth in the affected area
  • Breast engorgement
  • Fever and flu-like symptoms, such as chills and body aches
  • Nipple discharge, which may contain pus

The symptoms of Mastitis vary depending on the type. Some women have mild symptoms, while some have severe presentation of Mastitis.

Diagnosis of Mastitis

Mastitis is diagnosed by a physical examination of your breast by your healthcare practitioner. Diagnosing Mastitis as early as possible is important to prevent it from progressing to bacterial Mastitis.

Moreover, diagnosis is essential to differentiate Mastitis from Inflammatory Breast Cancer, which is a rare condition but has the same redness and swelling symptoms as Mastitis.

Prevention of Mastitis

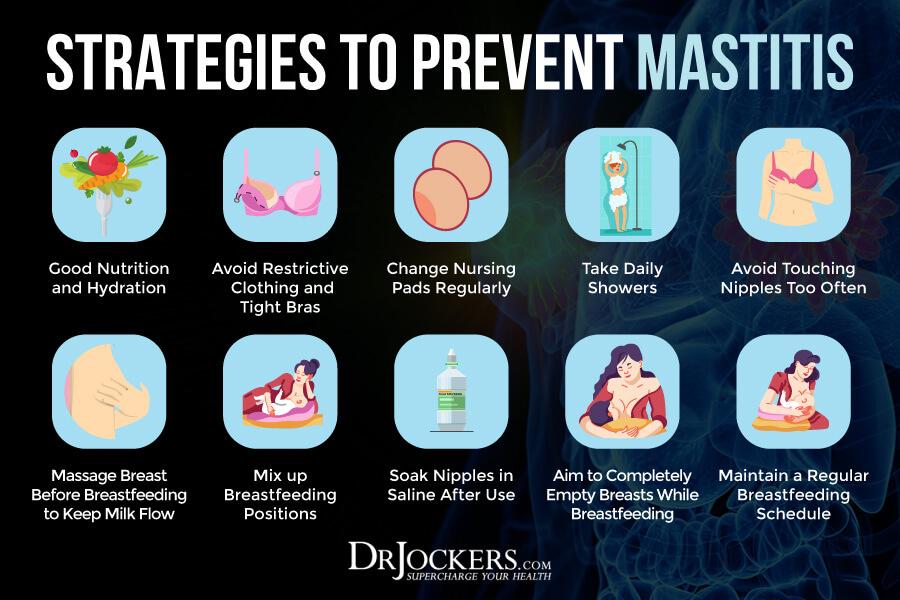
Prevention is vital in case of breastfeeding issues. For Mastitis, there are simple tips to follow to reduce the risk of painful infection. 

  • Maintain Breast Hygiene

Hygiene is necessary when it comes to caring for your baby and yourself. A clean breast is less prone to bacterial invasions. This saves you from having bacterial Mastitis.

  • Practice the Right Breastfeeding Techniques

Knowing how to breastfeed correctly is a blessing as many mothers, especially the first timers, don’t know how to breastfeed correctly and may encounter Mastitis. Ensure your baby is in the correct position (use a proper latch). Let your baby empty one breast completely before switching to the other breast during feeding.

Frequently change the baby’s position when breastfeeding so that each breast is drained completely. If your baby cannot breastfeed correctly, use a breast pump to drain the milk out of your breast.

  • Avoid Cracked Nipples

Bacterial Mastitis can occur due to cracked skin of your nipples, which is why taking care of the surface of your breast is necessary. Use breast shells or creams like Lanolin to protect your nipple.

Breastfeeding issues are common among women who are first-timers or have complexities during pregnancy. As a common breastfeeding complication, Mastitis needs to be understood and prevented to give your baby a safe and nutritious breastfeeding environment. As mothers strive to provide their little bundles of joy the best, having the right products can significantly enhance a positive breastfeeding experience. 

Our baby products at BabyD Agency are designed with pure care for both mother and child. They are perfect for you and your little one as our products prioritize ease of use and functionality, supporting proper breastfeeding techniques and minimizing the risk of conditions like Mastitis.

So visit BabyD Agency now and experience comfort and well-being throughout your breastfeeding phase. Because sip by sip, BabyD Agency nurtures the bond.

Becoming a parent is one of life’s greatest joys. But let’s be honest – it can also be extremely tiring, especially in the early months when your baby still wakes up frequently during the night. By around 5 months of age, most babies are developmentally ready to start learning the skill of sleeping through the night independently. Implementing a sleep training method can help your 5-month-old successfully achieve sleeping for prolonged periods without your help.

Sleep training, sometimes referred to as sleep teaching, is the process of helping your baby learn to self-soothe and fall asleep on their own. The goal is to have your child fall asleep independently at bedtime and go back to sleep on their own when they stir at night. While allowing your baby to cry it out for some time is part of some methods, the aim is not to let them endlessly cry themselves to exhaustion. Rather, sleep training aims to gradually teach the essential skill of self-soothing so they can drift off to sleep peacefully without parental assistance.

Sleep training can seem daunting at first, especially if you’re used to always being by your baby’s side as they fall asleep. But the long-term benefits of better sleep make it well worth the effort for both you and your child. After consistently implementing a sleep training plan, most babies become proficient self-soothers and drop night wakings dramatically. This means better sleep for the whole family!

When to Start Sleep Training Your 5 Month Old

The 5-month mark is a prime window for introducing sleep training. There are a few signs that indicate your baby is developmentally ready for the process of learning to self-soothe at bedtime and during night wakings:

  • Dropping middle-of-the-night feeds: Around 5 months of age, babies begin dropping those 2-3 am feeds and can go longer stretches at night without eating. This shows their digestive system has matured enough to go 6-8 hours without food.
  • No longer an infant: 5 months marks the end of the newborn stage. Babies this age are less apt to fall asleep accidentally after some fussing. Their sleep cycles have matured so they need active help from you to drift off.
  • Developing more regular sleep/wake patterns: Whereas newborns tend to sleep and wake at random, by 5 months babies have begun regulating their circadian rhythms. This makes timing an appropriate bedtime and implementing a sleep training method more feasible.
  • Increased mobility: Around 5 months, babies often learn to roll over or start sitting up. With this added movement and freedom comes disrupted sleep as they have an easier time getting into a seated position or rolling around the crib. Sleep training helps curb these night wakings.

The 4-6 month age range is the prime window for sleep training since babies this age have the key cognitive and physical developments that allow for success. Waiting until much later often means you’ll have an overtired baby who has ingrained sleep associations that are increasingly hard to break.

Newborn Sleep Training

Common Sleep Training Methods for 5 Month Olds

There are a few scientifically-backed methods commonly used for sleep training 5-month-olds. The major methods include graduated extinction, fading, and pick up/put down. While the approach differs slightly, they all share the same end goal of teaching your baby to self-soothe to sleep.

Graduated Extinction (Ferber Method)

With this method, you put your baby down awake at bedtime and allow them to fuss or cry for increasing intervals before responding. The first night, you let them fuss for 3 minutes before briefly comforting them without picking them up. The next night, you wait 5 minutes before the first check-in, then 7 minutes, then 10, adding a couple minutes each subsequent night. The goal is to gradually teach them to fall asleep independently while reassuring them briefly that you’re still nearby.

Fading (Camping Out)

Fading, sometimes called camping out or adult fading, involves sitting with your baby as they falls asleep and gradually moving your chair farther away each night. For example, the first night you sit right next to the crib, gently shushing and patting them to sleep. Over 7-10 nights, you slowly move your chair farther from the crib until you’re out of the room completely. This gradual withdrawal of contact fades out any sleep associations.

Pick Up/Put Down

As the name suggests, this method involves picking your baby up when they are fussy and putting them back down awake when they are calm and drowsy. You don’t want to let them fall asleep in your arms. Each time you return them to the crib, you let them fuss a bit longer before responding again. This teaches them to settle independently.

While the extinction method is effective for many families, the pick-up/put-down and fading methods may work better for parents who want to provide more physical reassurance during the process. The most important thing is choosing a sleep training tactic you feel comfortable implementing consistently.

Step-by-Step Guide to Sleep Training a 5 Month Old

Once you’ve selected the ideal sleep training method for your family, follow these steps to set your baby up for success:

  • Establish a relaxing pre-bedtime routine. A consistent, peaceful bedtime routine signals to your baby that sleep is coming. This might include a warm bath, getting into pajamas, reading a book, singing a lullaby, etc. Keep it to 3-4 calming activities in the same sequence each night.
  • Put baby down awake but drowsy. After your bedtime routine, put your baby in the crib while they are drowsy but still awake. This is key – you want them to learn to drift off independently without you rocking or feeding them to sleep.
  • Implement your chosen sleep training method. If doing graduated extinction, make your first check-in after 3 minutes if needed, then 5 minutes the next night, etc. For fading, start sitting right by the crib on night one and work your way out of the room over a week or so. With pick up/put down, pick them up when crying but put them back down before they fall asleep.
  • Be consistent. Consistency is crucial for sleep training success. Once you start the training, stick with the plan every night for at least a week before determining whether you need to adjust the approach.
  • Offer reassurance when checking in. When using methods like graduated extinction or fading that involve check-ins, briefly reassure your baby that you are present without stimulating them too much. A gentle pat or reassuring whisper is all you need – resist the urge to pick them up!

It may take 3-7 consistent nights before your baby learns the skill of falling asleep independently. Remain patient, committed, and consistent during this period. The short-term hassle of sleep training paves the way for better long-term sleep for your whole family!

Sleep Train

Tips and Tricks for Successful Sleep Training

Here are some helpful tips to enhance your chances of sleep training success with your 5-month-old:

  • Choose an appropriate wake window length: Time your bedtime correctly based on your baby’s last nap to ensure they are tired enough to fall asleep easily but not overtired and wired.
  • Make the room dark, cool, and quiet: An excessively bright, noisy, or hot room can disrupt sleep training. Optimize the sleep environment.
  • Use white noise: Soothing, constant white noise blocks disruptive house sounds to help the baby stay asleep.
  • Avoid nursing or bottle right before bed: Feeding to sleep is a tough association to break. End feedings 30 minutes prior.
  • Remain patient and consistent: Frequent night wakings may get worse before they get better as the baby protests. Stick with it for at least a full week.
  • Develop a comforting bedtime object: Introduce a special stuffed animal or blanket for the baby to associate with sleep.
  • Do daytime check-ins in the crib: Occasionally putting babies in the crib for naps gets them used to the space.
  • Make sure baby gets enough daytime sleep: Overtired babies resist sleep training, so ensure they get quality daytime naps.

With persistence and consistency, you can set your baby up for sleep success during this pivotal developmental window of 4-6 months old. Have patience with the process and yourself!

FAQs:

Q: Won’t sleep training be traumatic for my baby?

A: Letting your baby cry for any period often feels wrong in the moment. But remember, you are working towards the ultimate goal of giving your child the gift of peaceful independent sleep for years to come. Sleep training is not traumatic when done responsibly, and your baby will not hold it against you.

Q: What if my baby cries for hours?

A: It is rare for babies to cry for extremely prolonged periods during sleep training. If your baby is unable to settle after an hour or so, take a break and try again in a few days. You may need to adjust your method or the timing.

Q: How do I know if my baby is ready for sleep training?

A: Signs like dropping night feeds, transitioning out of the newborn phase, and developing more of a sleep/wake schedule all indicate readiness around 5 months. If you’re unsure, ask your pediatrician.

Q: What about night feeds?

A: Once your baby has dropped those middle-of-the-night feeds, feel free to continue 1-2 dream feeds spaced at least 5 hours apart overnight to ensure they don’t get hungry.

Conclusion

Implementing sleep training at the right time with an age-appropriate method can help your 5-month-old successfully learn independent sleep skills. Look for signs your baby is ready, choose a sleep training tactic you feel comfortable with, stick to a consistent bedtime routine, and remain patient through the ups and downs. With commitment and consistency, both you and your baby will be resting peacefully in no time. The process may seem daunting but the benefits are immense. Focus on the light at the end of the tunnel – better sleep and more restful nights!

For most new parents, those middle-of-the-night cries are an expected part of having a newborn. Babies wake frequently to feed, needing to eat every 2-3 hours around the clock in those early months. While disrupted sleep is normal, it can quickly take its toll on exhausted moms and dads. When sleep deprivation sets in, it can be hard to function and properly care for your little one.

The good news is there are things you can do to help your newborn sleep longer stretches at night. With patience and consistency, many babies can start sleeping for at least 5-6 hour chunks by 3-4 months old. While every child is different, using various techniques to establish healthy sleep habits can make a big difference in getting the rest you and your baby need.

In this article, we’ll cover some of the common factors affecting newborn sleep and solutions to tackle them. We’ll also explore popular sleep training techniques to help your little one learn to self-soothe and settle at bedtime and during night wakings.

Why Newborn Sleep is So Important

Before diving into solutions, it helps to understand why those overnight sleep stretches are so crucial for babies and parents alike.

For infants, sleep is essential for proper growth and development. It stimulates the release of the human growth hormone which aids in cell regeneration and overall health. Babies who get adequate shut-eye are less fussy and have an easier time learning new skills as they grow.

For mom and dad, those uninterrupted sleep cycles allow your body to move through the various stages of sleep properly. Deep, restorative sleep recharges your body and mind, allowing you to have the energy and patience needed for the demands of new parenthood. Sleep deprivation can negatively impact your mood, mental sharpness, and overall health.

The key is working together to ensure your newborn is getting the sleep they need to thrive, while also making sure your own sleep needs are met.

Newborn-Sleep

Factors Impacting Newborn Sleep

There are a few core reasons babies struggle with sleeping through the night in those early months. Understanding what is disrupting your newborn’s slumber can help you come up with effective solutions. Here are some of the most common factors:

Hunger

Newborns need to eat frequently, sometimes as often as every 2-3 hours. Their tiny tummies can’t go long between feedings, so hunger is a major cause of overnight wakings during the first few months. Ensuring your baby is getting enough to eat during daytime feedings can help minimize night wakings.

Feeding right before bedtime and using techniques like dream feeds can also help keep your baby satisfied for longer stretches at night. A dream feed is when you briefly and quietly rouse your sleeping baby to feed them, without fully waking them up. For some babies, this tops them off enough to sleep an additional 2-3 hours.

Dirty or Wet Diaper

Babies have very little bladder and bowel control, so sitting in a dirty or wet diaper will inevitably wake them up. Using super-absorbing overnight diapers can help minimize how often your baby awakens needing a change. But the average newborn will still need 2-3 changes per night.

Developing a diaper-changing routine with minimal stimulation can help get your baby back to sleep quicker. Turn lights low, avoid excessive talking, and do a calm diaper change and feeding if needed.

Sleep Associations

Newborns quickly develop associations between being nursed, rocked, or taken on car rides to sleep. These associations become sleep crutches, and your baby will start needing them to fall back asleep when they rouse between sleep cycles.

Breaking these associations gradually and establishing independent sleep skills are key for your baby sleeping longer stretches. This may involve sleep training techniques like fading or controlled crying to help your little one learn to self-soothe to sleep.

Poor Sleep Environment

A relaxing sleep environment is crucial for quality overnight sleep. An overheated room, excessive noise, bright lights, or discomfort from a wet diaper can all prevent a deep, uninterrupted slumber.

Optimizing your baby’s sleep setting by controlling temperature, light, sound, and other factors can remove environmental obstacles to long sleep stretches. A white noise machine, blackout curtains, and comfortable sleeping attire, and bedding can all promote better rest.

Sleep Training Techniques

Implementing a gentle but consistent sleep training plan can help babies learn the skills to self-soothe and settle themselves back to sleep during night wakings. Here are some of the most popular and effective approaches:

Graduated Extinction/Ferber Method

With this technique you put your baby to bed awake but drowsy and let them try to self-settle before responding to cries at increasing intervals – 5 minutes, then 10 minutes, then 15 minutes, etc. The goal is for them to learn to self-soothe to sleep. It may involve some crying but is gentle.

Fading/Camping Out

Fading involves sitting in a chair next to your baby’s crib as they fall asleep. Over successive nights you gradually move your chair further away until you’re out of the room completely. This method teaches self-settling skills with your reassuring presence.

Scheduled Awakenings

This involves waking your baby up on a schedule – say every 3-4 hours – for a brief feeding before they spontaneously wake themselves up. For some babies, scheduled feeds can eliminate the need for them to signal when hungry, allowing longer sleep periods.

When considering sleep training, make sure your pediatrician gives the go-ahead based on your baby’s age, weight, and overall health. Most methods can be implemented between 4-6 months, but every child has a different readiness level.

Start early, be extremely consistent, and know there may be some fussing involved as your baby learns this new skill. But with time they will begin sleeping more soundly through the night.

Newborn Sleep Solutions

Creating a Soothing Bedtime Routine

Establishing a predictable bedtime routine is key to cueing your baby that it’s time to wind down and sleep. This signals the brain to start producing melatonin to induce drowsiness. Try to follow the same sequence of activities in the same environment each night.

Here are some soothing bedtime routine ideas:

  • Warm bath
  • Infant massage with calming lotion
  • Rocking in a dimly lit room
  • Reading books with simple visuals and rhyming text
  • Soft music or white noise
  • Swaddling and soothing patting rhythms

Keeping bedtime consistent also helps regulate the circadian rhythm which controls sleep/wake cycles. Between 6-8 weeks when melatonin production increases, aim for an early bedtime between 7-8 pm.

FAQs about Newborn Sleep Solutions

Q: When can sleep training start?

A: Most experts recommend waiting until at least 4 months or when your baby shows signs of being ready – dropping night feeds, longer awake windows, and self-soothing attempts. Every baby has a different level of neurologic maturity required.

Q: What if my baby won’t stop crying?

A: Some fussing is normal, but prolonged, intense crying is a sign your baby may not be ready. Pause and try again in a week or two. Make sure there are no underlying issues like illness, teething, or reflux causing discomfort.

Q: How can I get the baby to sleep longer stretches?

A: Focus on daytime feedings and fullness, minimize night stimulation and stick to a schedule, limit sleep associations, and maintain a consistent, calming bedtime routine. Have patience, it takes time!

Q: What if sleep training isn’t working?

A: Make sure you’re being extremely consistent with the method and schedule. Try a different technique like fading instead of graduated extinction. See if there are any environmental factors disrupting sleep. Don’t give up!

Conclusion

While newborn sleep deprivation is tough, have hope that it does not last forever! By understanding the factors impacting your baby’s sleep and using gentle but consistent techniques, you can help them develop the skills to sleep soundly through the night. Be patient with the process, stick to a plan, and those peaceful overnight stretches will come soon enough.

Hey everyone! Today I want to talk about something that has been a huge help to me in my daily life – light housekeeping. As someone who struggles with a chronic illness, it’s not always easy to keep up with household chores. That’s where light housekeeping comes in. It’s a simple concept that can make a big difference in your daily routine.

Overview of Light Housekeeping

So what exactly is light housekeeping? Essentially, it’s a way of keeping your home tidy and organized without spending too much time or energy on it. Some examples of light housekeeping tasks include:

  • Making your bed
  • Wiping down surfaces
  • Doing a load of laundry
  • Vacuuming or sweeping high-traffic areas
  • Putting away clutter

The idea is to do small tasks consistently throughout the week so that your home never gets overwhelmingly messy.

Benefits of Light Housekeeping

Now, you might be wondering – why bother with light housekeeping? Can’t I just clean my whole house once a week and be done with it? While that’s certainly an option, there are some great benefits to incorporating light housekeeping into your routine:

  • You’ll feel more in control of your living space
  • Your home will always be “guest ready”
  • You’ll save time and energy in the long run by doing small tasks regularly
  • You’ll likely experience less stress and anxiety in a clean and organized space

All of these benefits add up to a happier and healthier home environment, which is something we could all use more of in our lives.

So there you have it – a quick overview of light housekeeping and why it’s worth considering. Give it a try and see if it makes a difference in your daily routine!

Differentiating Light Housekeeping from Regular Housekeeping

Hey there! As someone who believes that a clean and tidy home can greatly impact your well-being, I have often found myself facing the dilemma of how to balance everyday household tasks and my energy levels. That’s where light housekeeping comes in handy. Let me break it down for you.

Understanding Light Housekeeping

Light housekeeping is essentially keeping your home neat and organized by doing small tasks regularly throughout the week. By doing so, you can avoid feeling overwhelmed by a massive cleaning task. Light housekeeping tasks might include making your bed, sweeping high-traffic areas, wiping down surfaces, and so on. The key is to prioritize tidiness over perfection.

Difference between Light Housekeeping and Regular Housekeeping

The main difference between light housekeeping and regular housekeeping is the level of time and energy required for each. With light housekeeping, the aim is to do small tasks consistently, each one taking a few minutes at most. Regular housekeeping, on the other hand, is usually reserved for a more thorough deep clean that would require more hours of work.

By incorporating light housekeeping into your routine, you can keep your living space under control while still having enough energy to attend to other activities you enjoy. Give it a try and see if it works for you!

Types of Light Housekeeping

Hey there, as someone who enjoys keeping a clean home, I know firsthand how energy-consuming it can be. Luckily, I’ve discovered light housekeeping, which has been a lifesaver for me. In this blog post, I’ll be sharing some types of light housekeeping that can help you keep your home tidy without feeling overwhelmed.

Daily Light Housekeeping

One type of light housekeeping is daily tidying. It involves doing small tasks throughout the day that can contribute to keeping your home clean. Here are some examples:

  • Making your bed
  • Wiping down bathroom surfaces after use
  • Clearing out any clutter on surfaces
  • Sweeping high-traffic areas

By doing these tasks daily, you’ll avoid letting clutter and dirt build-up and reduce the amount of time you need to spend cleaning.

Weekly Light Housekeeping

Another type of light housekeeping is weekly cleaning. These tasks are deeper than your daily tasks but are still relatively easy to do and won’t take much of your time. Here are some examples:

  • Vacuuming and mopping the floors
  • Dusting surfaces and shelves
  • Cleaning bathrooms
  • Doing laundry

By focusing on these tasks weekly, your home will feel clean and organized without requiring you to spend all day cleaning.

In summary, light housekeeping can help keep your home organized without expending too much energy. By incorporating daily and weekly tasks into your routine, you’ll be able to maintain a clean home while also having time for other things you enjoy. Give it a try and see how it works for you!

Light Housekeeping Services

Hi there! As someone who loves to keep my home clean and tidy without spending too much time on it, I am excited to share with you some light housekeeping services that can help make your life easier too!

Light Housekeeping Services for the Elderly

For older adults who may not have the energy or mobility to clean their homes regularly, light housekeeping services can be a great option. Some examples of services offered to the elderly include:

  • Dusting and vacuuming floors
  • Cleaning bathrooms and kitchens
  • Making beds and changing linens
  • Laundry and ironing

These services can help maintain an organized and safe living environment while promoting independence for the elderly.

Light Housekeeping services for People with Disabilities

If you or someone you know has a disability, light housekeeping services can help make daily tasks more manageable. These services may include:

  • Dusting and cleaning surfaces
  • Sweeping and mopping floors
  • Cleaning bathrooms and kitchens
  • Laundry and ironing

Hiring a cleaning service can help provide peace of mind and reduce stress for those with disabilities.

In conclusion, light housekeeping services can be a great option for those who want to maintain a clean and organized home without spending too much time or energy. Whether you’re an older adult or have a disability, these services can be tailored to fit your unique needs.

Tools Required for Light Housekeeping

Hi everyone, I’m excited to talk more about light housekeeping services. If you’re looking to maintain a clean and tidy home, using the right tools and cleaning supplies can make a big difference! Here are some essential tools for light housekeeping:

Essential Tools for Light Housekeeping

  • Microfiber cloths: These are great for dusting and cleaning various surfaces without leaving streaks or lint behind.
  • Vacuum cleaner: A reliable vacuum cleaner is essential for cleaning floors and carpets.
  • Broom and dustpan: A broom and dustpan can be used for quick clean-ups in between vacuuming.
  • Mop: A mop can be used to clean hard floors and tiled surfaces.

Recommended Cleaning Supplies for Light Housekeeping

  • All-purpose cleaner: This can be used to clean various surfaces in the home such as countertops, sinks, and toilets.
  • Glass cleaner: This is great for cleaning mirrors, windows, and other glass surfaces without leaving streaks behind.
  • Floor cleaner: A floor cleaner specifically designed for the type of flooring in your home is important to maintain its quality.
  • Dusting spray: A dusting spray can help attract and hold onto dust particles when cleaning, making it easier to remove dirt and debris.

Using these tools and cleaning supplies can make a noticeable difference in the cleanliness of your home. I hope this information was helpful, and happy cleaning!

Light Housekeeping Checklist

Hey there! As a busy person, keeping your home clean and tidy can be a real challenge. But, with the right tools and a solid plan, you can stay on top of light housekeeping and maintain a comfortable living space. Here are some tips for getting started:

Daily Light Housekeeping Checklist

  • Make your bed in the morning to start the day off with a tidy space.
  • Wash dishes or load them into the dishwasher after each meal to avoid a pile-up.
  • Wipe down kitchen counters and surfaces after cooking and eating.
  • Sweep or vacuum high traffic areas to get rid of dirt and debris.
  • Do a quick tidy of living areas – put things away and straighten out cushions and pillows.

Weekly Light Housekeeping Checklist

  • Clean bathrooms – wipe down counters, sinks, and toilets and clean mirrors.
  • Wash floors in high traffic areas and mop hard floors in other areas.
  • Dust surfaces with microfiber cloths and use dusting spray for extra help with stubborn dust particles.
  • Wipe down appliances in the kitchen, including oven, microwave, and refrigerator.
  • Deep clean one room each week, such as wiping down baseboards and cleaning windows.

Following this light housekeeping checklist can help you maintain a clean and tidy home without feeling overwhelmed. And remember, these tasks can be divided among family members or tackled on your own – just find a schedule that works for you! Happy cleaning!

Tips for Effective Light Housekeeping

Keeping a clean and tidy home is important, but it can be challenging, especially when you’re busy with work and other responsibilities. However, with the right tools and a solid plan, you can keep your living space comfortable and clean. Here are some tips that have worked for me:

Organizing your tasks

Start by making a list of light housekeeping tasks that need to be done daily and weekly. Then, divide them into categories such as kitchen, bathroom, living areas, and bedrooms. This will help you stay organized and avoid feeling overwhelmed.

Creating a Plan for Light Housekeeping

Now that you have your list of tasks, create a plan for tackling them. For daily tasks, I recommend doing them in the morning or after each meal to avoid a pile-up. For weekly tasks, choose a specific day of the week to focus on deep cleaning one room at a time. You can also divide tasks among family members to make it more manageable.

Here’s an example checklist you can follow:

Daily TasksWeekly Tasks
Make bedClean bathrooms
Wash dishes or load them into the dishwasher after each mealSweep or vacuum high-traffic areas
Wipe down kitchen counters and surfaces after cooking and eatingDust surfaces with microfiber cloths and use dusting spray for extra help with stubborn dust particles
Sweep or vacuum high traffic areasWipe down appliances in the kitchen, including oven, microwave, and refrigerator
Do a quick tidy of living areas – put things away and straighten out cushions and pillowsDeep clean one room each week, such as wiping down baseboards and cleaning windows

Sticking to a light housekeeping routine can seem daunting at first, but it’s worth it in the long run. By breaking down tasks into manageable steps and creating a schedule, you’ll be able to maintain a clean and comfortable home without feeling overwhelmed.

Benefits of Light Housekeeping for Health

Hey there, as someone who spends a lot of time at home, I know how important it is to keep my living space clean and tidy. And not just for aesthetic reasons – there are actual health benefits to light housekeeping! Here are a few:

Reducing stress and anxiety

Clutter and mess can contribute to feelings of overwhelm and stress. By keeping your home tidy, you can create a calming environment that promotes relaxation and lowers anxiety levels. Plus, having a daily routine for light housekeeping can provide a sense of control and organization, which can help ease feelings of chaos.

Improving sleep quality

A clean and comfortable sleeping space can do wonders for your sleep quality. By regularly washing bedding, dusting surfaces, and keeping the bedroom clutter-free, you’ll create an inviting environment that promotes restful sleep. Plus, the act of cleaning itself can be a calming pre-bedtime ritual, which can help you wind down and prepare for sleep.

Overall, light housekeeping is a simple way to promote both physical and mental health. By taking small steps every day to keep your living space clean and comfortable, you’ll feel more relaxed, organized, and refreshed – all of which are essential for overall well-being.

Benefits of Light Housekeeping for Health

Hey there! As someone who spends a lot of time at home, I know how important it is to keep my living space clean and tidy. And not just for aesthetic reasons – there are actual health benefits to light housekeeping! Here are a few:

Reducing stress and anxiety

I have experienced that clutter and mess can contribute to feelings of being overwhelmed and stressed. By keeping my home tidy, I can create a calming environment that promotes relaxation and lowers my anxiety levels. Plus, having a daily routine for light housekeeping provides me with a sense of control and organization which eases feelings of chaos.

Improving sleep quality

I have noticed that a clean and comfortable sleeping space can do wonders for my sleep quality. By regularly washing bedding, dusting surfaces, and keeping the bedroom clutter-free, I create an inviting environment that promotes restful sleep. Plus, the act of cleaning itself can be a calming pre-bedtime ritual, which helps me wind down and prepare for sleep.

In conclusion, light housekeeping is a simple way to promote both physical and mental health. By taking small steps every day to keep my living space clean and comfortable, I feel relaxed, organized, and refreshed – all of which are essential for my overall well-being.

Importance of Light Housekeeping

Light housekeeping is not just about aesthetics; it has significant benefits for our physical and mental health. It reduces stress, promotes organization, improves sleep quality, and helps prevent the spread of germs and illnesses. So, it’s essential to make light housekeeping a part of our daily routine.

Frequently Asked Questions

Q: How much time should I spend on light housekeeping?

A: 15-20 minutes a day is enough to keep your space clean and tidy.

Q: Can light housekeeping replace deep cleaning?

A: No, deep cleaning is important to remove built-up dirt and bacteria. However, light housekeeping can help maintain cleanliness between deep cleaning sessions.

Sleep training baby refers to the process of helping infants and young children learn to fall asleep on their own and stay asleep through the night. There are several different methods of sleep training, including the Ferber method, the Weissbluth method, and the pick-up-put-down method. Each method involves gradually teaching babies how to self-soothe and sleep for longer periods without relying on external stimuli, such as rocking, feeding, or being held.

The Importance of Sleep for Babies

Sleep is essential for your baby’s growth and development. It is during sleep that the body produces growth hormones, which are important for physical development. Sleep also strengthens memory, improves cognitive function, and helps with emotional regulation. A well-rested baby is also more likely to have a positive mood and disposition, which can lead to a better quality of life both for the baby and for their caretakers. Ensuring that your baby gets enough sleep is crucial, which is why many parents turn to sleep training methods.

Overall, sleep training can be an effective way to help your child develop healthy sleep habits and ensure they are getting enough rest. However, it is important to find the method that works best for you and your family and to remain consistent in your approach to help your baby successfully learn how to fall asleep on their own.

Understanding Sleep Training

What is Sleep Training

As a parent, you might have heard about sleep training and how it can help your baby develop healthy sleep habits. Sleep training is the process of teaching infants and young children to fall asleep on their own and stay asleep throughout the night. There are different methods of sleep training that you can choose from depending on your family’s needs and parenting style.

The Importance of Sleep for Babies

Getting enough sleep is essential for your baby’s growth and development. As a baby sleeps, their body produces necessary growth hormones for physical development while also enhancing cognitive function, memory, and emotional regulation. A well-rested baby tends to be happier, less fussy, and more alert throughout the day.

When to Start Sleep Training Baby

The ideal time to start sleep training varies from one baby to another. As a general rule of thumb, it is recommended that you wait until your baby is at least four months old before starting sleep training. It is important to ensure your baby is healthy, gaining weight and has no underlying health issues that could affect their ability to sleep before starting sleep training.

Age Range for Sleep Training

Sleep training typically targets babies between four and six months old. However, some parents may start at an earlier or later age depending on their parenting style.

Signs Your Baby Is Ready for Sleep Training

Not all parents may want to start sleep training at four months, and that’s okay. However, it is recommended that you consider beginning sleep training when your baby shows certain signs, such as:

  • Frequent night awakenings
  • Inconsistent sleeping patterns
  • Difficulty sleeping without a sleep association, such as being rocked or being nursed
  • Short daytime naps and difficulty napping for longer periods
  • An overall cranky behavior throughout the day due to poor sleep

Overall, sleep training is a personal decision, and every parent must choose what works best for their baby and family. As a parent, it is essential to remember that consistency is key when it comes to sleep training.

Understanding Sleep Training

What is Sleep Training?

As a new parent, I was interested in learning about sleep training and how it could help my baby develop healthy sleep habits. Sleep training is a process of teaching infants and young children to fall asleep on their own and stay asleep throughout the night. There are different methods of sleep training that we can choose from depending on our family’s needs and parenting style.

The Importance of Sleep for Babies

I also learned that getting enough sleep is essential for my baby’s growth and development. During sleep, their body produces necessary growth hormones for physical development while also enhancing cognitive function, memory, and emotional regulation. As a result, a well-rested baby tends to be happier, less fussy, and more alert throughout the day.

When to Start Sleep Training

It is recommended that we wait until our baby is at least four months old before starting sleep training. Before initiating any sleep training, ensuring that our baby is healthy, gaining weight, and has no underlying health issues that could affect their ability to sleep, is essential.

Age Range for Sleep Training

Most parents tend to start sleep training between four to six months old. However, some may start at an earlier or later age depending on their parenting style.

Signs Your Baby Is Ready for Sleep Training

Not all parents may want to start sleep training at four months, and that’s okay. However, we might want to consider beginning sleep training when our baby shows certain signs, such as frequent night awakenings, inconsistent sleeping patterns, difficulty sleeping without a sleep association (such as being rocked or nursed), short daytime naps and difficulty napping for longer periods, overall cranky behavior throughout the day due to poor sleep.

Sleep Training Methods

Cry It Out Method

One popular sleep training method is the “cry it out.” This method involves putting our baby to bed awake and letting them cry for increasingly extended periods until they fall asleep. We can gradually increase the time between checks until our baby can soothe on their own. It requires patience and consistency.

No Tears Method

Another sleep training method is the “no tears” method, which involves implementing a pre-sleep routine that helps our baby relax and feel calm before bed. We help soothe them without picking them up or removing them from the crib. We may need to repeat this several times throughout the night, depending on our baby’s needs.

It is vital to remember that sleep training is a personal decision and every parent must choose what works best for their baby and family. Practicing consistency is crucial when it comes to sleep training.

Preparing for Sleep Training

Establishing a Bedtime Routine

As a new parent, I knew I needed to prepare for sleep training by creating a consistent bedtime routine for my baby. This routine could include a warm bath, reading a book, and singing a lullaby. These activities would signal to my baby that it’s time to go to sleep. It’s essential to start the routine at the same time every night to establish a structured schedule that would make sleep training easier.

Setting up a Comfortable Sleeping Environment

Another thing I did to prepare for sleep training was to set up a comfortable sleeping environment for my baby. This included maintaining a cool room temperature, dressing my baby in comfortable pajamas, and making sure the crib was free of any potential distractions. By creating a comfortable sleeping environment, my baby would be less likely to wake up throughout the night and would be able to sleep more soundly.

Remember that every child is different, and what works for one family may not work for another. As you prepare for sleep training, keep in mind your family’s needs, parenting style, and goals for your baby’s sleep. Establishing a healthy sleep pattern takes patience, consistency, and commitment, but it is worth the effort in the long run.

The Do’s and Don’ts of Sleep Training

Dos of Sleep Training

When preparing for sleep training, there are a few things you should consider doing:

  • Establish a Consistent Bedtime Routine: This is key to making sleep training work. A predictable routine allows your baby to anticipate bedtime and settle down more easily.
  • Create a Soothing Environment: Make sure the sleeping environment is conducive to sleeping, which means keeping it cool and quiet. Using white noise machines or blackout curtains could also help.
  • Set Realistic Expectations: It’s crucial to understand that sleep training is not a quick fix. It takes time and consistency. Don’t expect results overnight.
  • Stay Consistent: It’s important to follow through with the plan every night. This can be challenging in the beginning, but it will eventually become a habit.

Don’ts of Sleep Training

Avoid these common mistakes when sleep training your baby:

  • Starting Too Early: Newborns need to eat frequently during the night, so trying to impose a sleep schedule before two or three months old may disrupt their development.
  • Expecting Immediate Results: As mentioned earlier, sleep training takes time, and progress happens gradually. Don’t expect overnight success.
  • Night Weaning Too Soon: Breastfed babies may need to nurse at night for several months into their lives. Wait until your baby is ready to go without nighttime feedings completely before you try to eliminate them.
  • Ignoring Your Baby’s Needs: It’s important to check on your baby during the night if they are crying or have needs that require your attention. Sleep training is not about ignoring your baby’s needs – rather, it’s about teaching them to fall asleep on their own.

Remember, sleep training takes time, consistency, and patience. Don’t be discouraged by setbacks, and celebrate small wins along the way. With a little effort, both you and your baby can enjoy better sleep in the long run.

How Long Does Sleep Training Take?

Duration of Sleep Training

When I was sleep-training my baby, I learned that it takes time and effort to establish good sleep habits. It’s important to have realistic expectations about how long the process will take. Every baby is different, so there’s no one-size-fits-all answer to this question. However, most experts agree that it can take anywhere from a few days to a few weeks to see noticeable improvements in your baby’s sleep.

Tips for Sticking to the Sleep Training Plan

In my experience, consistency is key when it comes to sleep training. It can be challenging to stick to the plan, especially if your baby is going through a growth spurt, teething, or experiencing any other changes. Here are some tips that helped me stay on track:

  • Create a plan that works for your family’s schedule and needs, and stick to it as closely as possible.
  • Be patient and give your baby time to adjust to the new routine. Progress may be slow at first, but don’t get discouraged.
  • Involve your partner or a trusted caregiver in the process to help share the responsibilities and provide support.
  • Celebrate small milestones along the way, such as longer stretches of sleep or easier settling at bedtime.
  • Remember that sleep training is not a one-time event – you may need to adjust your plan as your baby gets older and his or her sleep needs change.

In conclusion, sleep training can be a challenging but rewarding process. With patience, consistency, and a little bit of trial and error, you and your baby can enjoy better sleep in the long run.

What To Do When Your Baby Wakes Up at Night

How to Handle Night Waking

When my baby started waking up frequently at night, I was left feeling exhausted and unsure of what to do. Luckily, some tips can help make the process of resettling your baby easier. Firstly, it’s important to stay calm and patient. Your baby may pick up on any sense of stress or anxiety, so try and maintain a relaxed atmosphere. Additionally, avoid overly stimulating activities or bright lights when resettling your baby to help encourage sleep.

Tips for Resettling Your Baby

To help resettle your baby back to sleep after a night waking, here are some tips that might work for you:

  • Use a comforting touch or gentle voice to soothe your baby.
  • Stick to a consistent bedtime routine to help regulate your baby’s sleep patterns.
  • Check if your baby is hungry or needs a diaper change.
  • Consider using a white noise machine or other sleep aids to promote better rest for your baby.
  • Avoid picking up or rocking your baby back to sleep every time they wake up, as this can create a dependency on these actions.

By implementing some of these tips and strategies, you may find that your baby can sleep for longer periods at night. Remember that it may take some time to see results, but with patience and persistence, you can help your little one get the rest they need.

What To Do When Your Baby Wakes Up at Night

How I Handled Night Waking with My Baby

When my baby started waking up frequently at night, I felt exhausted and unsure of what to do. However, I learned some tips that made the process of resettling my baby easier. Firstly, I tried to stay calm and patient. I knew that my baby could pick up on any sense of stress or anxiety, so I tried to maintain a relaxed atmosphere around them. Additionally, I avoided overly stimulating activities or bright lights when resettling my baby, which helped encourage sleep.

Tips for Resettling My Baby

To help resettle my baby back to sleep after a night waking, here are some tips that worked for me:

  • I used a comforting touch or gentle voice to soothe my baby.
  • I established a consistent bedtime routine to help regulate my baby’s sleep patterns.
  • I checked if my baby was hungry or needed a diaper change.
  • I used a white noise machine or other sleep aids to promote better rest for my baby.
  • I avoided picking up or rocking my baby back to sleep every time they woke up, as this can create a dependency on these actions.

Common Sleep Training Challenges

Separation Anxiety

Separation anxiety is a common challenge many parents face when trying to get their baby to sleep through the night. A good way to deal with it is to gradually increase separation during the day and avoid lingering when you put your baby down at night. Additionally, try to create a consistent bedtime routine that includes calm and soothing activities, such as reading a book or singing lullabies.

Teething

Teething can cause discomfort and make it difficult for your baby to sleep at night. During this time, try giving your baby a teething toy or a frozen washcloth to chew on. Additionally, you can try giving them over-the-counter medication specifically designed for teething pain, such as baby acetaminophen or baby ibuprofen. However, always consult with your pediatrician before giving any medications to your baby.

What I Did When My Baby Woke Up at Night

How I Handled Night Waking with My Baby

When my baby started waking up frequently at night, I was exhausted and unsure of what to do. However, I learned some helpful tips that made the process of resettling my baby easier. Firstly, staying calm and patient was very important. It’s because a baby can pick up on any sense of stress or anxiety. Secondly, I avoided overly stimulating activities or bright lights when resettling my baby, which helped encourage sleep.

Tips for Resettling My Baby

Some of the tips that worked for me when resettling my baby were:

  • I always used a comforting touch or gentle voice to soothe my baby.
  • I established a consistent bedtime routine to help regulate my baby’s sleep patterns.
  • I checked if my baby was hungry or needed a diaper change.
  • I used a white noise machine or other sleep aids to promote better rest for my baby.
  • I avoided picking up or rocking my baby back to sleep every time they woke up, as this can create a dependency on these actions.

Common Sleep Training Challenges

Separation Anxiety

Dealing with separation anxiety is a common challenge for many parents when trying to get their baby to sleep through the night. What worked for me is gradually increasing separation during the day and avoiding lingering when putting my baby down at night. Lastly, creating a consistent bedtime routine that includes calm and soothing activities, such as reading a book or singing lullabies, also helped.

Teething

Teething can cause discomfort and make it difficult for your baby to sleep at night. During this time, what helped me was trying out some teething toys or a frozen washcloth to chew on. Additionally, I tried giving my baby over-the-counter medication for teething pain, such as baby acetaminophen or baby ibuprofen, after consulting with my pediatrician.

Benefits of Sleep Training

Sleep training your baby benefits both the baby and the parents. While better sleep ensures a healthy and happy baby, it also makes for well-rested parents who can be more engaged in their child’s life.

Final Thoughts on Sleep Training Your Baby

It’s essential to remember that each baby is unique when it comes to sleep training. What worked for my baby might not work for yours. So, be patient, and consistent, and always remember to consult with your pediatrician whenever in doubt about sleep concerns.

Hi there! As a new parent, one of the things that you might be struggling with is getting your baby to sleep. It’s a common struggle, but it’s essential to your baby’s health and development.

In this blog post, we’ll be discussing why training your baby to sleep in a bassinet is important and the ideal time to start the training process.

Why training baby to sleep in a bassinet is important

Sleep training is a method designed to help babies learn how to self-soothe and fall asleep without outside intervention. One of the first steps in sleep training is creating a safe sleep environment for your baby. Bassinets are an excellent choice because they provide a secure, cozy, and comfortable space for your baby to sleep.

Additionally, sleeping in a bassinet reduces the risk of Sudden Infant Death Syndrome (SIDS). Babies who sleep in a bassinet are less likely to get trapped between pillows, blankets, or the side of the bed, which can be fatal. Therefore, training your baby to sleep in a bassinet is essential for both their safety and development.

The ideal time to start training baby

The ideal time to start sleep training your baby varies from child to child. Most babies can begin sleeping in a bassinet from birth. However, it’s essential to note that all babies develop at their own pace, and some might need more time to adjust than others.

It’s recommended that parents start sleep training when their baby is around three to four months old. By this time, babies have developed a consistent sleep-wake cycle, which makes it easier for them to learn good sleep habits.

In conclusion, training your baby to sleep in a bassinet is an essential aspect of their health and development. It’s essential to find the right time for your child and to create a safe sleep environment to ensure they get the sleep they need.

Preparation

Hey there! As a new parent, I understand how overwhelming it can be to prepare for your baby’s arrival. One of the things you’ll need to consider is where your baby will sleep. In this blog post, we’ll discuss the necessary preparations for training your baby to sleep in a bassinet.

Selecting the right bassinet

When selecting a bassinet, make sure to look for one that is safe and comfortable for your baby. Choose a sturdy bassinet, that has a firm mattress and breathable sides. Also, opt for a bassinet that comes with a fitted sheet made from soft and gentle fabric to help your baby sleep better without irritation.

Setting up the bassinet for baby’s comfort

Before placing your baby in the bassinet, ensure that it is set up correctly. Consider placing the bassinet near your bed for easy access at nighttime. The temperature in the room should also be comfortable for your baby, which means not too hot or too cold. Opt for light blankets that won’t be too warm for the baby.

In conclusion, preparing for your baby’s sleep training in a bassinet is essential. Make sure you choose the right one and set it up for your baby’s comfort. By doing so, your baby can learn to self-soothe and fall asleep efficiently in their safe and secure space!

Preparation for Training Your Baby to Sleep in a Bassinet

Hello, fellow parents! As a new parent myself, I know how challenging it can be to prepare for your little one’s arrival. One crucial aspect to consider is where your baby will sleep, and in this blog post, I’ll share some tips to prepare for training your baby to sleep in a bassinet.

Selecting the Right Bassinet

When choosing a bassinet, always prioritize your baby’s safety and comfort. Select a sturdy one with a firm mattress and breathable sides. Make sure it comes with a fitted sheet made from soft and gentle fabric. This can help your baby sleep soundly without any irritation.

Setting up the Bassinet for Your Baby’s Comfort

The bassinet should be placed close to your bed, so it’s easy to access your baby during nighttime feedings. Ensure that the room temperature is comfortable, not too hot or cold. You can use light blankets that won’t be too warm for your baby’s delicate skin.

Establishing a Bedtime Routine

Creating a Consistent Bedtime Routine

Establishing a regular sleep schedule is beneficial for both you and your baby. It’s essential to create a consistent bedtime routine that includes relaxing activities like a warm bath or gentle massage. This will help signal to your baby that it’s time to sleep.

Importance of Sticking to a Routine

Sticking to a routine can help your baby feel safe and secure, which can significantly improve sleep quality. Try to be consistent with the time your baby goes to bed and wakes up in the morning. Over time, your baby will learn the routine and start falling asleep faster and staying asleep for more extended periods.

In conclusion, preparing for your baby’s sleep training is crucial, but it doesn’t have to be a daunting task. By selecting the right bassinet and establishing a consistent bedtime routine, you can help your baby sleep better and feel more relaxed.

Preparation for Training Your Baby to Sleep in a Bassinet

Hey there fellow parents! As a new parent myself, I understand how overwhelming it can be to prepare for your little one’s arrival. One of the most crucial things to consider is where your baby will sleep. In this post, I’ll share some tips on how to prepare for training your baby to sleep in a bassinet.

Selecting the Right Bassinet

When choosing a bassinet, prioritize your baby’s safety and comfort. A sturdy one with a firm mattress and breathable sides is an excellent choice. Make sure it comes with a fitted sheet made of soft and gentle fabric for your baby’s comfort.

Setting up the Bassinet for Your Baby’s Comfort

Place the bassinet close to your bed, so you can quickly tend to your baby during nighttime feedings. Ensure the room temperature is comfortable and not too hot or cold. You can use light blankets that won’t be too warm for your baby’s delicate skin.

Establishing a Bedtime Routine

Creating a Consistent Bedtime Routine

Establishing a regular sleep schedule is essential for both you and your baby. Create a consistent bedtime routine that includes relaxing activities such as a warm bath or gentle massage. This will help signal to your baby that it’s time to sleep.

Importance of Sticking to a Routine

Sticking to a routine can help your baby feel safe and secure, which can significantly improve sleep quality. Try to be consistent with the time your baby goes to bed and wakes up in the morning. Over time, your baby will learn the routine and start falling asleep faster and sleeping for more extended periods.

Consistent Sleep Environment

Creating a conducive environment for the baby to sleep

Creating a conducive sleep environment is essential to help your baby sleep soundly. Use soft and soothing colors for the nursery, like pastels, and avoid stimulating objects.

Managing light and temperature in the nursery

Make sure the room is dark enough to encourage sleep, especially during naptime. Install blackout curtains or use a white noise machine if necessary. Manage the temperature, so it’s not too hot or cold, and use a good quality humidifier to keep the air comfortable.

Remember that preparing for your baby’s sleep training can be easy with a little preparation and patience. Try one tip at a time to see what works best for your little one.

Preparation for Training Your Baby to Sleep in a Bassinet

Hi, fellow parents! As a new parent myself, I understand how overwhelming it can be to prepare for your little one’s arrival. One of the most crucial things to consider is where your baby will sleep. Here are some tips on how to prepare for training your baby to sleep in a bassinet:

Selecting the Right Bassinet

When choosing a bassinet, you should prioritize your baby’s safety and comfort. Choose a sturdy one with a firm mattress and breathable sides. Make sure it comes with a fitted sheet made of soft and gentle fabric for your baby’s comfort.

Setting up the Bassinet for Your Baby’s Comfort

It’s important to place the bassinet close to your bed, so you can quickly tend to your baby during nighttime feedings. Ensure the room temperature is comfortable and not too hot or cold. Use light blankets that won’t be too warm for your baby’s delicate skin.

Sleep Training Techniques

Gradual Retreat Method

In this technique, you gradually move away from your baby as they fall asleep until they can sleep independently. Start by sitting next to the bassinet as they fall asleep, then gradually move away from the bassinet night after night until you’re out of sight but within earshot.

Fading Method

This involves gradually reducing your level of intervention as your baby falls asleep. You can start by patting their tummy, humming, or singing a lullaby as they drift off to sleep. Over time, you can reduce the amount of time you spend doing these things until you can leave the room without waking them.

Consistent Sleep Environment

Creating a conducive environment for the baby to sleep

A conducive sleep environment is essential to help your baby sleep soundly. Use soft and soothing colors for the nursery, like pastels, and avoid stimulating objects.

Managing light and temperature in the nursery

Make sure the room is dark enough to encourage sleep, especially during naptime. Install blackout curtains or use a white noise machine if necessary. Manage the temperature, so it’s not too hot or cold, and use a good quality humidifier to keep the air comfortable.

Remember that preparing for your baby’s sleep training can be easy with a little preparation and patience. Try one technique at a time to see what works best for your little one.

Preparing Your Baby to Sleep in a Bassinet

Hey there, fellow parents! As a new parent myself, I know how crucial it is to prepare for our baby’s arrival. One of the most important decisions we have to make is where our baby will sleep. Here are some tips on preparing your baby to sleep in a bassinet:

Selecting the Right Bassinet

First, choose a bassinet that is safe and comfortable for your baby. Look for one with a firm mattress and breathable sides. Pick a fitted sheet made from soft, gentle fabric for your baby’s comfort.

Setting up the Bassinet for Your Baby’s Comfort

Position your bassinet close to your bed, so you can quickly tend to your baby during nighttime feedings. Ensure the room temperature is comfortable and not too hot or cold. Use light blankets that won’t be too warm for your baby’s delicate skin.

Sleep Training Techniques

Gradual Retreat Method

With the gradual retreat method, you move away from your baby gradually as they fall asleep until they learn to sleep independently. Start by sitting next to the bassinet as they fall asleep, then gradually move away from the bassinet night after night until you’re out of sight but still within earshot.

Fading Method

The fading method involves reducing your intervention as your baby falls asleep gradually. You can start by patting their tummy, humming, or singing a lullaby as they drift off to sleep. Over time, you can decrease the amount of time you spend doing these things until you can leave the room without waking them.

Consistent Sleep Environment

Creating a Conducive Environment for Baby to Sleep

A conducive sleep environment is essential to help your baby sleep soundly. Use soft and soothing colors for the nursery, like pastels, and avoid stimulating objects.

Managing Light and Temperature in the Nursery

Make sure the room is dark enough to encourage sleep, especially during naptime. Install blackout curtains or use a white noise machine if necessary. Manage the temperature, so it’s not too hot or cold, and use a good quality humidifier to keep the air comfortable.

Gradual Extension Method

Gradual Extension Method Explained

The gradual extension method involves gradually extending the time between visits to your baby’s room at night. This method helps your baby learn to fall asleep without needing you to soothe them to sleep. Start by waiting a few minutes before checking on them, then gradually increase the time each night until your baby can sleep for longer stretches without needing you.

Benefits of the Gradual Extension Method

The gradual extension method is a gentle way to teach your baby to self-soothe and sleep better through the night. This method can also help reduce nighttime feedings, helping both you and your baby get more restful sleep.

Remember, preparing for your baby’s sleep training takes patience and preparation. Try one technique at a time to see what works best for your little one. Good luck!

Preparing My Baby to Sleep in a Bassinet

Hi there, fellow parents! As a new mom myself, I understand the importance of preparing for my baby’s arrival, including selecting where my baby will sleep. Here are some tips I’ve learned on preparing my baby to sleep in a bassinet:

Selecting the Right Bassinet

I chose a bassinet that’s safe and comfortable for my baby, with a firm mattress and breathable sides. I made sure to pick fitted sheets made from soft, gentle fabric for my baby’s comfort.

Setting up the Bassinet for My Baby’s Comfort

I positioned the bassinet close to my bed, so I could easily attend to my baby during nighttime feedings. I made sure the room temperature was comfortable and chose light blankets that wouldn’t be too warm for my baby.

Sleep Training Techniques

Teaching My Baby to Self-Soothe

One of the most important aspects of sleep training is teaching my baby to self-soothe. This skill allows my baby to fall back asleep on their own without needing me to intervene.

Techniques to Improve Self-Soothing Skills

I tried gradual retreat and fading methods to help my baby learn to sleep independently. Over time, I reduced the amount of time I spent soothing or checking on my baby until they could sleep for longer stretches without needing me.

Consistent Sleep Environment

Creating a Conducive Environment for My Baby to Sleep

A soothing and consistent sleep environment is crucial for my baby to sleep soundly. I chose soft and calming colors for the nursery and avoided stimulating objects.

Managing Light and Temperature in the Nursery

I made sure the room was dark enough to encourage sleep, especially during naptime, by using blackout curtains or a white noise machine. I managed the temperature, so it was comfortable for my baby and used a humidifier to keep the air quality good.

The Importance of Self-Soothing Skills

Self-soothing skills are essential for my baby’s growth and development. This skill helps them sleep independently and reduces their dependence on me to soothe them to sleep during every waking period.

Remember, preparing for sleep training takes time and patience. Trying one technique at a time is essential to see what works best for my little one. Good luck!

Troubleshooting Sleep Problems

Hey fellow parents! As a new mom, I understand how difficult it can be when your little one isn’t sleeping well. Here are some tips I’ve learned on troubleshooting sleep problems:

Common sleep problems in babies

Some common sleep issues that babies experience are difficulty falling asleep, frequent night wakings, and short naps during the day.

Solutions to common sleep issues

To help my baby fall asleep more easily, I established a consistent bedtime routine and made sure to create a calm and dimly lit environment. To reduce frequent night wakings, I made sure my baby’s feedings and diaper changes were done before bedtime and tried to avoid stimulation during nighttime feedings. For short naps during the day, I created a naptime routine and used white noise to help my baby fall asleep and stay asleep.

Remember, every baby is different, and it can take some trial and error to find what works for your little one. Don’t be afraid to ask for help or advice from your pediatrician or other parents in your support network. Together, we can help our babies get the restful sleep they need for their growth and development!

Troubleshooting Sleep Problems

Hi there fellow parents! As a new mom myself, I completely understand how challenging it can be when your little one doesn’t sleep well. That’s why I’ve put together some tips and tricks that I have learned to help troubleshoot sleep problems and ensure a good night’s rest for both baby and parent.

Common Sleep Problems in Babies

Some common sleep issues that babies experience include difficulty falling asleep, frequent night wakings, and short naps during the day. These issues can make it tough for both baby and parent to get the necessary rest that they need.

Solutions to Common Sleep Issues

I’ve discovered several ways to help my baby fall asleep more easily. Establishing a consistent bedtime routine and creating a calm and dimly lit environment have helped immensely. To reduce frequent night wakings, I made sure to feed and change my little ones before bedtime and tried to avoid anything that would stimulate them during nighttime feedings. For short naps during the day, creating a naptime routine and using white noise have been game changers.

Summary of Key Takeaways

  • Establish a consistent bedtime routine
  • Create a calm and dimly lit environment
  • Feed and change the baby before bedtime
  • Avoid stimulation during nighttime feedings
  • Create a naptime routine
  • Use white noise to help the baby fall asleep and stay asleep

Final Thoughts

Remember, every baby is unique and what works for one, may not work for another. Don’t hesitate to ask for help or advice from your pediatrician or other parents in your support network. With these tips and a little patience, your baby can eventually develop healthy sleep habits that work for both of you. Good luck!

As a new owner of newborn French Bulldog puppies, there are a few things to keep in mind. These puppies are cute, cuddly, and require a lot of attention. They weigh between 1-2 pounds and their eyes will be closed for the first 10-14 days. During this time, they rely on their sense of smell and touch to communicate with their mother and littermates. It’s important to handle them gently and not to separate them from their mother until they are at least 8 weeks old. Additionally, their diet is crucial at this stage, as they require frequent feedings of high-quality puppy formula.

Why Proper Care is Important for Newborn French Bulldog Puppies

Proper care is essential for the health and well-being of newborn French Bulldog puppies. Neglect or mistreatment can lead to developmental and health issues in the future. It’s important to provide them with a warm and safe environment, including a cozy bed and clean surroundings. Regular veterinary check-ups are also necessary to monitor their growth and development, as well as to ensure they receive the necessary vaccinations and treatments. As they grow and become more active, they will require increased socialization, training, and exercise. By providing proper care at this critical stage of life, you’ll help ensure your French Bulldog puppies develop into happy, healthy adults.

Hi there! As a new owner of newborn French Bulldog puppies, I want to share with you some important things to keep in mind. These little ones may be adorable, but they also require a lot of attention and proper care for their health and well-being.

Understanding Newborn French Bulldog Puppies

When your French Bulldog puppies are first born, they’ll weigh between 1-2 pounds and their eyes will be closed for the first 10-14 days. During this time, they’ll rely on their sense of smell and touch to communicate with their mother and littermates. It’s crucial to handle them gently and allow them to stay with their mom until they’re at least 8 weeks old. Plus, providing a high-quality puppy formula is the key to their diet.

Feeding Newborn French Bulldog Puppies

Types of Milk for Newborn French Bulldog Puppies

There are two types of milk that you can give to your French Bulldog puppies: mother’s milk or a milk replacer formula. Puppy formula is specifically designed to provide the necessary amounts of essential nutrients that puppies need for proper growth and development.

How to Bottle-feed Newborn French Bulldog Puppies

You can bottle-feed your newborn French Bulldog puppies by using a small feeding bottle or a syringe with a feeding nipple. It’s important to ensure correct positioning during feeding and to avoid overfeeding, which can lead to digestive problems. You should feed your puppies small amounts every couple of hours, adjusting the frequency and quantity as they grow older.

Remember, providing the proper care for your newborn French Bulldog puppies is essential for their healthy development. By following these tips and consulting with your veterinarian, your little ones will grow into happy and healthy adults.

Hello there! As a new owner of French Bulldog puppies, I wanted to share with you some important things I learned about caring for newborn puppies. It’s essential to maintain proper hygiene and provide them with the right diet for their growth and development.

Maintaining Hygiene for Newborn French Bulldog Puppies

Bathing and Grooming Newborn French Bulldog Puppies

When it comes to bathing, newborn puppies don’t need frequent baths. You can use a damp towel or sponge to wipe them down gently. Avoid using human shampoo, as it may dry out their skin. Grooming is an important part of maintaining their hygiene, but newborn puppies don’t have much hair yet. You can use a soft brush or comb to keep them tidy and comfortable.

Cleaning the Ears and Eyes of Newborn French Bulldog Puppies

Keeping their eyes and ears clean is crucial for preventing infections. Use a damp cotton ball to clean around their eyes and ears gently. Don’t insert anything into their ears, as it’s easy to damage their delicate eardrums. If you notice any discharge or redness, contact your vet immediately.

Remember that French Bulldog puppies are sensitive and require proper care for their health and well-being. By following these tips and consulting with your veterinarian, you can provide a clean and comfortable environment for your little ones to grow up healthy and happy.

Hello there! As a new owner of French Bulldog puppies, I’m excited to share some essential tips for taking care of newborn puppies. Maintaining hygiene and ensuring comfort are crucial for their health and development.

Ensuring Comfort for Newborn French Bulldog Puppies

Creating a Comfortable Sleeping Environment

Newborn puppies need a warm and comfortable sleeping environment. You can create a cozy bed using soft blankets or a cushioned box with a heating pad underneath. However, make sure the heating pad is not too hot and doesn’t burn their delicate skin. Also, ensure the bed is not too big, as this increases the risk of a puppy getting lost or stifled.

Keeping Newborn French Bulldog Puppies Warm and Cozy

French Bulldog puppies are vulnerable to low temperatures and can easily get cold. You can keep them warm by providing a heating source, such as a heat lamp or heating pad. However, always check the temperature carefully to avoid any injuries. Also, avoid direct contact with the heating source as it may burn their delicate skin.

Newborn French Bulldog puppies are sensitive and require proper care for their health and well-being. By following these tips and consulting with your veterinarian, you can provide a warm and comfortable environment for your little ones to grow up healthy and happy.

Hi everyone, being a new French Bulldog puppy parent has been both exciting and challenging. In this blog, I want to share some essential tips that I have learned for taking care of newborn French Bulldog puppies to ensure their health and development.

Providing Medical Attention for Newborn French Bulldog Puppies

Vaccinating Newborn French Bulldog Puppies

Vaccinating your French Bulldog puppies is crucial to protect them from various diseases. Generally, puppies receive their initial vaccination around six to eight weeks of age, followed by a booster shot four weeks later. Always consult with your veterinarian to develop an appropriate vaccination schedule.

Identifying and Treating Common Health Issues

Newborn French Bulldog puppies may experience common health issues such as diarrhea, dehydration, or fleas. It is important to monitor your puppies’ behavior and symptoms regularly and consult with your veterinarian at the first sign of any health problem. Prompt medical attention can prevent these issues from getting worse.

To sum it up, taking care of newborn French Bulldog puppies requires commitment, attention, and care. By providing adequate medical attention and following these tips, you can ensure a healthy and happy life for your furry friends.

Hi there fellow French Bulldog enthusiasts! As a proud caretaker of a brand new litter of French Bulldog puppies, I have been learning the ropes on how to provide the best possible care for my little ones. In this blog entry, I want to share some tips on how to socialize newborn French Bulldog puppies – because as much as it is important to keep them healthy and safe, it is equally important to ensure they grow up to be happy and well-adjusted dogs.

Socializing Newborn French Bulldog Puppies

Interacting with Newborn French Bulldog Puppies

The first and most important step in socializing your newborn French Bulldog puppies is to interact with them regularly from the very beginning. Play with them gently, handle them sensitively, and make sure they get used to being touched and held by humans. This helps establish trust, builds confidence, and teaches your puppies that human touch is not something to be frightened of.

Introducing Newborn French Bulldog Puppies to Your Home

Once your puppies are old enough to leave their mother, it’s time to start introducing them to your home and family. Start by giving them a dedicated area where they can feel secure and comfortable – a playpen or a crate will work well. Gradually introduce them to new people, objects, and sounds, but always make sure they feel safe and reassured. And don’t forget to give them plenty of positive reinforcement – treats, pats, and words of encouragement will help them learn and grow.

Taking care of newborn French Bulldog puppies is an adventure of a lifetime, but with patience, dedication, and love you can ensure that your furry friends will thrive in their new environment. Good luck!

Hello, fellow French Bulldog lovers! As someone who has recently welcomed a litter of adorable French Bulldog puppies, I’ve been learning a lot about how to provide them with the best care possible. In this blog post, I want to share some tips on how to train and reinforce positive behavior in your newborn French Bulldog puppies.

Training Newborn French Bulldog Puppies

Starting Basic Training for Newborn French Bulldog Puppies

The key to training your newborn French Bulldog puppies is consistency and repetition. Start by teaching them simple commands such as “sit” and “stay” using rewards like treats or praise. Keep training sessions short and frequent, around 5-10 minutes each time, so that they don’t get overwhelmed.

Reinforcing Positive Behavior in Newborn French Bulldog Puppies

Positive reinforcement is a critical aspect of training your newborn French Bulldog puppies. Make sure you reward them for good behavior, such as following commands, being calm, or using their potty pads. Be patient and keep encouraging them with lots of love and affection.

Remember that training takes time, so don’t get discouraged if your puppies don’t pick up on things right away. With persistence and positivity, your newborn French Bulldog puppies will eventually become well-trained and happy members of your family.

Hey there fellow French Bulldog enthusiasts! I’m thrilled to share with you my personal experience raising a litter of adorable French Bulldog puppies and how I ensured they received the best possible care. In this blog post, I’ll be discussing some tips on how to train your newborn French Bulldog puppies and reinforce positive behavior for a happy and healthy future.

Caring for the Dam and Sire

Proper Nutrition and Exercise for the Dam and Sire

Before we dive into training your puppies, it’s essential to ensure that the Dam and Sire are receiving proper nutrition and exercise. Make sure to feed them high-quality, protein-rich dog food and provide regular exercise and playtime. A healthy Dam and Sire lead to healthy puppies.

Providing a Safe and Comfortable Environment for the Dam and Sire

Next, create a comfortable environment for the Dam and Sire by providing a warm, clean, and safe space to rest. This will reduce stress and anxiety for both parents and contribute to a healthy litter. You can also invest in pet furniture that caters specifically to their needs.

Training Newborn French Bulldog Puppies

Starting Basic Training for Newborn French Bulldog Puppies

Consistency is key when it comes to training newborn French Bulldog puppies. Start with simple commands like “sit” and “stay,” reinforce positive behavior with praises or treats, and hold frequent short training sessions to avoid overwhelming your puppies.

Reinforcing Positive Behavior in Newborn French Bulldog Puppies

Positive reinforcement is crucial during training, make sure to reward good behavior with love and affection for your puppies; this will encourage them to keep up the good work. Don’t forget to stay patient as training takes time. Your puppies will soon be well-trained and happy members of your family.

Hey, it’s great to connect with fellow French Bulldog lovers! Let me share with you my personal experience of raising a litter of adorable French Bulldog puppies. As a responsible breeder, I made sure to provide the best care for my newborn puppies to ensure their healthy and happy lives.

Caring for the Dam and Sire

Proper Nutrition and Exercise for the Dam and Sire

For a healthy litter, it’s crucial to provide proper nutrition and exercise to the Dam and Sire. I fed them high-quality dog food enriched with proteins, vitamins, and minerals that met their dietary requirements. I also allocated sufficient time for daily exercise and playtime.

Providing a Safe and Comfortable Environment for the Dam and Sire

A clean, safe, and warm environment is essential to reduce anxiety for parents and ensure proper rest during pre-pregnancy and after delivery. Investing in pet furniture specifically for their needs is also necessary.

Training Newborn French Bulldog Puppies

Starting Basic Training for Newborn French Bulldog Puppies

The key to training newborn puppies is consistency. I used simple commands like “sit” and “stay” and repeatedly reinforced positive behavior with praise and treats in short training sessions.

Reinforcing Positive Behavior in Newborn French Bulldog Puppies

Positive reinforcement involves rewarding good behavior with love and affection. Keeping patience is vital as training takes time.

Conclusion

In conclusion, raising French Bulldog puppies requires effort, dedication, and attention to detail. However, the joy of seeing healthy, happy, and well-trained puppies makes it all worthwhile.

The Importance of Proper Care for Newborn French Bulldog Puppies

Proper care for French Bulldog puppies is crucial as it influences their lifelong health and happiness. Nutritious food, exercise, a comfortable environment, and consistent training are essential for healthy and well-adjusted puppies.

Frequently Asked Questions

Q: How often do French Bulldog puppies need to eat?

A: They need to eat every 2-4 hours for the first few weeks of life.

Q: When should you start training French Bulldog puppies?

A: You should begin training as early as possible to encourage healthy habits from an early age.

Q: What is the ideal temperature for newborn French Bulldog puppies?

A: The ideal temperature is 26-28°C (78-82°F) for the first week of life, gradually decreasing to 21-23°C (70-74°F) by the end of week four.

As a new parent, one of the challenges I faced was feeding my newborn while on the go. Whether it was a long car ride or a quick trip to the grocery store, I needed to find ways to make sure my little one was both comfortable and safe.

In this blog post, I’ll share some tips and tricks I learned about feeding a newborn in a car seat.

Overview of feeding a newborn in a car seat

Feeding a newborn in a car seat can be tricky, but with a bit of preparation, it’s doable. Some things to keep in mind include:

  • Timing: Try to time your car trips around your baby’s feeding schedule whenever possible.
  • Supplies: Bring plenty of supplies (e.g., bottles, formula/breast milk, burp cloths) so you don’t need to worry about running out.
  • Comfort: Make sure your baby is comfortable in their car seat before you start feeding them.

Importance of safety and proper positioning

While feeding your newborn in a car seat can be convenient, safety should always be your top priority. Some things to keep in mind include:

  • Avoid feeding your baby while the car is moving. Instead, pull over or wait until you’ve reached your destination.
  • Make sure your baby’s head is properly supported and not slumped forward, which can make it difficult for them to breathe.
  • Check the straps on your baby’s car seat regularly to ensure they are properly adjusted.

By following these tips, you can help ensure that feeding your newborn in a car seat is both safe and comfortable for everyone involved.

Feeding a Newborn in a Car Seat: Tips and Tricks

Being a new parent can be overwhelming, particularly when it comes to feeding your newborn while on the go. Whether it’s a long road trip or a quick errand, you want to make sure that your little one is both comfortable and safe. As a mom with experience, I have some tips and tricks that may be helpful for you!

Overview of Feeding a Newborn in a Car Seat

Feeding a newborn in a car seat can seem impossible, but with some preparation, it’s doable. Here are some things to keep in mind:

  • Try to plan your car trips around your baby’s feeding schedule if possible.
  • Bring extra supplies like bottles, formula or breast milk, and burp cloths.
  • Ensure that your baby is comfortable in their car seat before starting to feed them.

Safety Guidelines

American Academy of Pediatrics Recommendations

The American Academy of Pediatrics (AAP) advises against feeding your baby while the car is in motion. Instead, it recommends that you pull over to the side of the road or wait until you reach your destination.

Proper Use of Car Seat and Harness

To ensure that your baby’s head is properly supported and not slumped forward, make sure that the car seat is reclined at an angle between 30 and 45 degrees. Additionally, remember to always check your baby’s car seat straps to make sure they are correctly adjusted and secure.

By following these tips, you can ensure that feeding your newborn in their car seat is not only safe but also comfortable for everyone involved.

Feeding a Newborn in a Car Seat: Tips and Tricks

Hey there, fellow new parents! As a mom who has been through the daunting task of feeding my newborn in a car seat, I have some tips and tricks to make it a bit easier for you.

Overview of Feeding a Newborn in a Car Seat

Feeding your newborn in a car seat can be tricky, but with some foresight and preparation, it’s manageable. Here are a few things to keep in mind:

  • Try to plan your car trips around your baby’s feeding schedule if possible.
  • Always bring extra supplies like bottles, formula or breast milk, and burp cloths.
  • Ensure that your baby is comfortable in their car seat before you start feeding them.

Risks of Feeding in a Car Seat

Choking hazards

Feeding your baby in a car seat can present choking hazards. If your baby’s head slumps forward while they are feeding, they may not be able to swallow properly, leading to choking. To avoid this, make sure the car seat is reclined at an angle between 30 and 45 degrees to keep your baby’s head from slumping.

Breathing difficulties and oxygen deprivation

If your baby is positioned incorrectly in their car seat while being fed, they may struggle to breathe properly. This can result in oxygen deprivation, which can be fatal. To prevent this, follow the American Academy of Pediatrics (AAP) recommendation of pulling over to feed your baby, rather than feeding them while the car is in motion.

By keeping these risks in mind and following the guidelines for safe feeding practices, you can ensure that your baby stays safe and comfortable while being fed in their car seat.

Hey everyone, I know how overwhelming it can be to feed a newborn in a car seat. As a mom who’s been through it, I want to share some tips and tricks to make it easier for you.

Feeding a Newborn in a Car Seat: Tips and Tricks

Feeding your little one in a car seat can be challenging, but with some preparation, you can make it manageable. A few things to keep in mind include planning your car trips around your baby’s feeding schedule, bringing extra supplies like bottles, formula, or breast milk, and ensuring your baby is comfortable in their car seat before starting.

Risks of Feeding in a Car Seat

While feeding your baby in a car seat is doable, there are some risks to keep in mind. There’s a potential for choking if your baby’s head slumps forward, making it difficult for them to properly swallow. Additionally, if your baby isn’t positioned correctly in their car seat while feeding, they can experience breathing difficulties and oxygen deprivation, which can be fatal.

Pull over and feed in a safe location

To prevent these risks, consider following the guidelines set by the American Academy of Pediatrics (AAP) and pull over in a safe location to feed your baby. This way, you can ensure that your little one is safely positioned and able to breathe properly while feeding.

Plan ahead and feed before leaving

Another alternative is to plan and feed your baby before leaving, especially if you know that your car trip will take longer than usual. This way, you can prevent any potential risks that come with feeding during a car ride.

I hope these tips help make feeding your newborn in a car seat a bit more manageable. Remember to always prioritize your baby’s safety while on the road.

Hi, fellow parents! Having been through the stress of feeding my newborn in a car seat, I know how tough it can be. However, with some preparation, there are ways to make it easier and safer.

When is it Necessary to Feed in a Car Seat?

Long car trips and emergencies

Sometimes, it’s unavoidable to feed your baby in a moving car. Long car trips and emergencies may require you to feed your baby while in their car seat. In these cases, it’s important to plan by ensuring that your baby is properly positioned and that you have enough supplies like bottles, formula, or breast milk.

Assessing the risks and benefits

While feeding your baby in a car seat can be convenient, it’s important to assess the risks and benefits. There is a potential for choking or breathing difficulties if your baby isn’t positioned correctly or if they slump forward. In such cases, consider pulling over in a safe location to feed your little one. Alternatively, try feeding them before leaving when possible.

Remember to prioritize your baby’s safety while on the road. With these tips in mind, feeding your newborn in a car seat can certainly be manageable.

Hey there, fellow parents! As a mom who has experienced feeding my newborn in a car seat during long car trips, I feel you when it comes to the stress and challenges. But with some tips and preparation, it can be made easier and safer.

When is it Necessary to Feed in a Car Seat?

Long car trips and emergencies

Sometimes, feeding your baby while in a moving car is unavoidable. During long car trips or emergencies, like sudden hunger pangs or diaper blowouts, you may need to feed your little one while in their car seat. Make sure to plan by checking their positioning and ensuring that you have enough supplies like bottles, formula, or breast milk.

Assessing the risks and benefits

While it can be convenient, it’s essential to assess the risks and benefits of feeding your baby in a car seat. Slouching or slumping incorrectly can potentially lead to breathing difficulties or choking hazards. Consider pulling over in a safe location to feed your baby or feed them before leaving when possible to avoid unnecessary risks.

Correct Positioning in a Car Seat

Avoiding slouching and slumping

To prevent your baby from slouching or slumping while feeding, make sure that their car seat’s straps and harnesses are adjusted correctly. Avoid positioning their head too far forward or leaning their head to one side as it may compromise their airway.

Optimal angles and support

Additionally, aim for an optimal feeding angle of around 45 degrees. You can also use a rolled-up towel or a breastfeeding pillow for additional support. Ensure that the car seat is correctly reclined to prevent any choking hazards if the milk flows too fast.

Remember, safety should always be a top priority when on the road. By keeping these tips in mind, feeding your newborn in a car seat can be easy and manageable.

Hey fellow parents, as a mom who has gone through the challenge of feeding my newborn in a car seat during long road trips, I completely understand the stress that comes with it. However, with some simple tips and preparation, it can become a lot more comfortable and safer for your little one.

Tips for Safe and Comfortable Feeding in Car Seat

Prepare ahead of time

Whether it’s a long car trip or an emergency, sometimes feeding your baby while in a moving car is inevitable. In such cases, make sure to plan by checking your little one’s positioning and ensuring that you have enough bottles, formula, or breast milk supply. Having everything ready before starting your trip can make feeding on the go a lot easier.

Use breastfeeding or bottle-feeding techniques

It is essential to use the right techniques while feeding your baby in a car seat to avoid any risks. Try to avoid slouching or slumping – make sure that their car seat’s straps and harnesses are adjusted correctly. Use rolled-up towels or breastfeeding pillows to support your baby’s head and find an optimal feeding angle of around 45 degrees. Confirm that the car seat is correctly reclined to prevent any choking hazards if the milk flows too fast.

Always prioritize safety while on the road so that you both can have a comfortable journey. By following these tips, feeding your little one in a car seat can become a manageable experience.
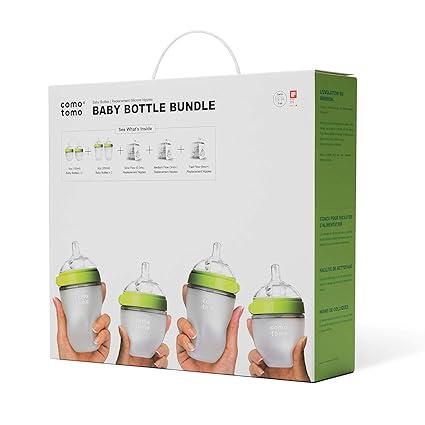
Hey there, fellow parents! As a mom who has faced the challenges of feeding my newborn in a car seat during long road trips, I completely understand the stress that comes with it. However, with some simple tips and preparation, it can become a lot more comfortable and safer for your little one.

Tips for Safe and Comfortable Feeding in Car Seat

Prepare ahead of time

Whether it’s a long car trip or an emergency, sometimes feeding your baby while in a moving car is inevitable. In such cases, make sure to plan ahead by checking your little one’s positioning and ensuring that you have enough bottles, formula, or breast milk supply. Having everything ready before starting your trip can make feeding on the go a whole lot easier.

Use breastfeeding or bottle-feeding techniques

It is essential to use the right techniques while feeding your baby in a car seat to avoid any risks. Try to avoid slouching or slumping and ensure that their car seat’s straps and harnesses are adjusted correctly. Use rolled-up towels or breastfeeding pillows to support your baby’s head and find an optimal feeding angle of around 45 degrees. Confirm that the car seat is correctly reclined to prevent any choking hazards if the milk flows too fast.

Common Myths and Misconceptions

Beliefs that feeding in a car seat is harmless

Many people believe that feeding a baby in a car seat is harmless. However, this is not entirely true. Research shows that car seats are not designed for feeding, and feeding your baby in a car seat increases the risk of choking and aspiration. Additionally, using a bottle while a baby sits upright can increase the risk of ear infections.

Research and statistics

According to research, feeding a baby while traveling by car increases the risk of choking by four times. It is crucial to understand the risks involved and take necessary precautions to ensure your baby’s safety.

Always prioritize safety while on the road, so that you both can have a comfortable journey. By following these tips and busting myths, feeding your little one in a car seat can become a manageable experience.
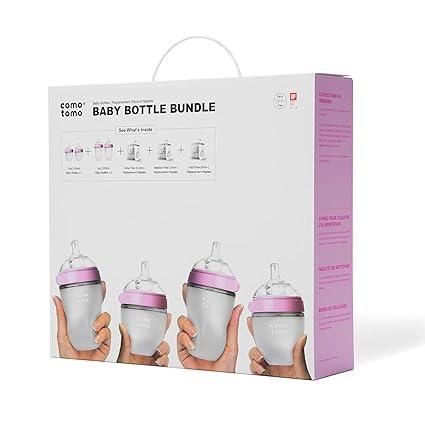
Hey there, fellow parents! As a mom who has gone through the struggles of feeding my newborn in a car seat during long road trips, I completely understand how stressful it can be. However, with some simple tips and preparation, you can make the experience more comfortable and safer for your little one.

Tips for Safe and Comfortable Feeding in Car Seat

Prepare ahead of time

Whether it’s a long car trip or an emergency, sometimes feeding your baby while in a moving car is inevitable. In such cases, always plan ahead by checking your little one’s positioning and ensuring that you have enough bottles, formula, or breast milk supply. Having everything ready before starting your trip can make feeding on the go a lot easier.

Use breastfeeding or bottle-feeding techniques

It is vital to use the right techniques while feeding your baby in a car seat to avoid any risks. Avoid slouching or slumping and ensure that their car seat’s straps and harnesses are adjusted correctly. Use rolled-up towels or breastfeeding pillows to support your baby’s head and find an optimal feeding angle of around 45 degrees. Confirm that the car seat is correctly reclined to prevent any choking hazards if the milk flows too fast.

Common Myths and Misconceptions

Beliefs that feeding in a car seat is harmless

Many people believe that feeding a baby in a car seat is harmless. However, this is not true. Research shows that car seats are not designed for feeding, and feeding your baby in a car seat increases the risk of choking and aspiration. Additionally, using a bottle while a baby sits upright can increase the risk of ear infections.

Research and statistics

According to research, feeding a baby while traveling by car increases the risk of choking four times. It is crucial to understand the risks involved and take necessary precautions to ensure your baby’s safety.

Final thoughts on feeding a newborn in a car seat

Feeding a newborn in a car seat can be challenging, but by following these tips, it can become more manageable. Always prioritize your baby’s safety while on the road to ensure a comfortable journey for both of you. Remember, preparation and proper techniques play a vital role in minimizing the risks of feeding your baby in a car seat.

Emphasis on safety and informed decision-making

It’s essential to make informed decisions when it comes to feeding your baby in a car seat. Keep in mind the risks involved and prioritize your baby’s safety at all times. By doing this, you create a safer, more comfortable journey for your little one.

After hours of trying to soothe your fussy baby, you’re probably wondering if there are any magic tricks out there that you don’t know about.

It just so happens that there is one bundle of tricks known as the “5 S’s.” Pediatrician Harvey Karp pioneered this method when he brought together five techniques that mothers have often used and organized them into this easy mnemonic: swaddle, side-stomach position, shush, swing, and suck.

What are the 5 S’s for?

Swaddling, a cornerstone of calming, recreates the gentle hug and security of the womb, which increases sleep. It also decreases the startle reflex, where babies’ flailing arms can bonk them in the face and wake them up. Plus, wrapped babies can respond faster to the other 4 S’s and stay soothed longer because their arms can’t wriggle around. To swaddle correctly, wrap your baby like a mini burrito with their arms snug and straight at their sides. But let Baby’s hips be loose and flexed. You can use a large square lightweight blanket or my sleep swaddle which takes all the guesswork out of swaddling. Babies should only be swaddled during fussing and sleep and swaddling needs to stop once your baby can roll over.

Despite your exhaustion and frustration, you know that your baby is crying because it’s the only way they have to tell you that they need something.

But you’ve played with your baby, fed them, burped them, checked their diaper, and ensured they aren’t in pain — so why are they still fussing? Don’t despair. It doesn’t have to be like this. Using the 5 S’s can make it easy to soothe your baby.

If your baby is crying for 3 or more hours a day, 3 or more days a week, during the first 3 months of life, count yourself among this unlucky group. Colic usually starts at around 6 weeks and often fades by month 3 or 4, but it’s rough-going on both baby and you.

Falling asleep isn’t always easy for babies, and this is particularly so if your baby is overtired. By replicating the sensations experienced in the womb, parents can lull their babies into a long, restful sleep.

Step 1: Swaddle

Swaddling means wrapping up your baby to make them snug as a bug. Anecdotal reports and some dated research shows that swaddled babies sleep longer and better than un-swaddled babies. Why so? Most likely, when your baby’s snug and warm, they’re dreaming of the good old days in your womb.

In addition, swaddling reduces the likelihood of babies waking themselves up with their Moro Reflex— startling at sudden sounds or movement and flailing their little arms.

Take a look at this video to see how swaddling is easy peasy. Here’s the trick summarized:

  • Lay your baby on a piece of soft fabric that’s been folded into a diamond shape.
  • Fold one side of the fabric over and tuck it under their arm.
  • Lift the bottom and tuck it in.
  • Fold over the second side and tuck the end into the fabric wrapped around your baby’s back.
  • Optimal but recommended: Give them a kiss and a hug.

Tips for the perfect swaddle:

  • Leave two fingers of space between the swaddling fabric and your baby’s chest for wiggle room.
  • Watch out for tight swaddling around the hips and legs that could cause hip development issues.
  • Avoid bundling your baby with too many warm layers under the swaddle.
  • Stop swaddling when your baby can roll onto their stomach.
Step 2: Side-stomach position

Research trusted sources show that babies who sleep on their tummies sleep longer and don’t react as quickly to noise. One big problem, though: Putting a baby to sleep on their stomach or side is dangerous, as it increases the risk for sudden infant death syndrome (SIDS).

According to Karp, holding babies in a supine position activates a calming mechanism that soothes their rattled system (and yours).

So go ahead — hold your baby on their tummy or side; lay them over your shoulder; or lay them across your forearm with your hand supporting their head.

But remember: When your baby has calmed down, place them on their back for sleep time.

Tips for the perfect side-stomach position:

  • Put your bare baby on your chest with skin-to-skin contact for great bonding time. A 2020 Study shows that even very preemie babies (30 weeks at birth) are calmed by this contact.
  • When your baby reaches 6 months old, they’ll most likely be able to flip themselves over, but it’s still best to play safe, abide by the rules, and keep putting them to sleep on their backs until they’re 1 year old.
Step 3: Shush

You know what shush means, but does your baby? You bet! Contrary to what you might think, your baby heard plenty of muffled sounds while in your womb including:

  • the pumping of your blood circulation
  • the rhythmic in and out of your breathing
  • the rumble of your digestive system
  • the drone of outside noises

When you make a loud shhh sound, you get pretty close to the blended sounds that your baby is used to. But there’s more to it.

Research shows that controlled in-and-out breath sounds can alter a baby’s heartbeat and improve their sleep patterns. That’s because we’re programmed to fall in sync with an external rhythm. Science calls this “entrainment.” Moms call it a miracle that saves their sanity.

Tips for the perfect shushing technique:

  • Don’t turn down the volume — your baby will probably soothe fastest if you shush loud and long. Think of how the sound of a vacuum cleaner can calm an infant. Unbelievable, right?
  • Put your mouth close to your baby’s ear so that the sound enters directly.
  • Match the volume of your shushing to the volume of your baby’s cry. As they begin to settle, turn your shushing down.
Step 4: Swing

Who hasn’t pushed a fussy infant’s carriage back and forth a million times harboring the hope that they’ll fall asleep?

You’re right — movement is a great way to calm a fussy baby.  2014 research on both animals and humans showed that crying babies who are carried around by their moms immediately stop all voluntary movements and crying. In addition, their heart rate decreased. Add in some choreographed swinging and you have one happy baby.

How to swing:

  • Start by supporting your baby’s head and neck.
  • Sway back and forth about an inch and add a touch of bounce.

By keeping your baby facing you and smiling, you can turn these moments into a bonding experience as well as teach your baby how to focus and how to communicate.

Tips for the perfect swing:

  • Rock slowly for a baby who’s already calm and just needs to be sent to dreamland, but use a faster pace for a baby who’s already yelling.
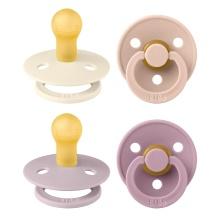
  • Keep your movements small.
  • Once your baby’s calm, you can give your arms rest by settling them in a swing. (Just never leave them unattended in a swing.)
  • Never, ever, shake your baby. Shaking can lead to brain damage and even death.
Step 5: Suck

Sucking is one of the primitive reflexes that your baby has. Having started practicing in your womb as a 14-week-old embryo, your baby is already a pro at sucking. (Plenty of babies have been caught in the act by ultrasound imaging.)

While sucking for calming may be a no-brainer, researchers in 2020 Study set out to prove it.

When you encourage your baby to suck for comfort, know that you’re backed by hard facts: Babies enjoy sucking and are calmed by sucking even without feeding. It’s called non-nutritive sucking.

While you could let your baby suckle at your breast, for a little more freedom, you may want to use a pacifier. Keep in mind that the American Academy of Pediatrics (AAP) generally recommends holding back a pacifier until you and your baby have a nice breastfeeding routine — at around 3 or 4 weeks of age. And if you’re searching for the right pace, we’ve got you covered with this list of 15 best pacifiers.
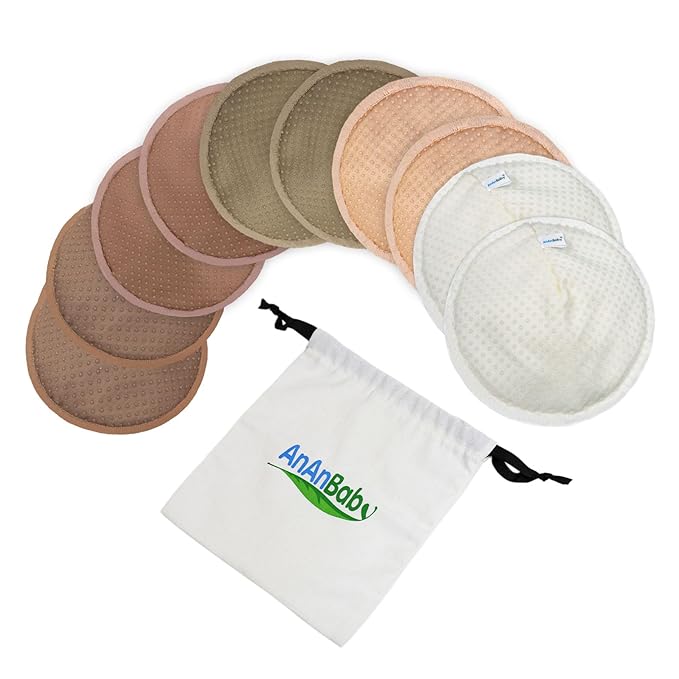

Tips to give your baby the perfect suck:

  • Don’t hold back a pacifier because of the worry that you’ll never get rid of it. Habits aren’t formed until around 6 months.
  • Still worried about bad habits? Thumb sucking is harder to stop.
  • In cases when you don’t have a pacifier, you can offer your baby your clean pinky to suck. Keep the pad of your finger upturned against the roof of your mouth. You’ll be surprised at the sucking power of someone so tiny.

A crying baby is no fun. If you’re concerned that your baby’s crying can’t be put down to normal crankiness, discuss your concerns with your pediatrician.

Incessant crying wears away at the fabric of the family. As you practice these five steps and learn what works best with your baby, you’ll be able to add your twist to them. Have fun!

Guiding Your Family Through Change

From Hospital to Home

The Fourth Trimester Transition

Confidence, Rest & Rhythm

Expert Support for Your New Normal